As the best HTPC media center software on the Internet today, Kodi can play pretty much digital media file out there. For Blu-ray movie enthusiasts, you may be disappointed to find that Kodi is unable to play Blu-ray disc since it lacks a built-in Blu-ray decoder. The good news is that there are still some alternative ways to get Blu-ray movies played on Kodi. The following part will share you 3 workable solution to make that achieved.
Solution 1: Play Blu-ray on Kodi with external Blu-ray player
Solution 2: Play Blu-ray on Kodi with MakeMKV & XBMC Blu-ray plug-in
Solution 3: Rip Blu-ray for Kodi playback with Blu-ray Ripping tool
Solution 1: Play Blu-ray on Kodi with external Blu-ray player
To play Blu-ray disc with Kodi, you will need three things:
– A PC or HTPC media center running Kodi
– A Blu-ray disc drive
– A PC Blu-ray player application – Cyberlink PowerDVD 16 Ultra as your external player
Following are the video guide to show you how to setup and configure Cyberlink PowerDVD 16 Ultra for Kodi Blu-ray playback.
For the detailed text guide, please visit:
http://homemediaportal.com/how-to-play-blu-ray-movie-discs-with-kodi/
Related article: Plex VS Emby | Play Blu-ray with Kodi on Raspberry Pi 3 | View DVD ISO on Xbox One via Kodi
Solution 2: Play Blu-ray on Kodi with MakeMKV & XBMC Blu-ray plug-in
Apart from PowerDVD, you can also use the free DVD-Ripping application MakeMKV coupled with an XBMC plug-in to get pretty close Blur-ray experience on Windows. Here’s how to set it all up:
Step 1: Install MakeMKV.
Download the installation package from MakeMKV’s website and install it would any other program.
Step 2: Install and tweak Blu-ray Plug-in for XBMC
Next, you’ll need to install the BluRay plugin for XBMC. Download the zip file linked on that page and install it to XBMC’s video plugins folder.
On Windows, it will either be in your AppData folder (C:\Users\Whitson Gordon\AppData\Roaming\XBMC\plugins\video), where Whitson Gordon is your username) or XBMC’s program folder (wherever you installed XBMC, most likely C:\Program Files\XBMC\plugins\video).
After extracting the BluRay folder to this location, you may have to tweak a few other settings. First, disable User Account Control by hitting the Start Menu and typing “User Account Control” into the search box. Click on “Change User Account Control Settings” and drag the slider down to “Never Notify”. If you’re watching Blu-rays at your computer screen with a mouse and keyboard, this step isn’t necessary, but if you’re using a remote control, you’ll need to disable this so you don’t get a popup every time you try to play a disc. (Make sure you know the risks of disabling Account Control settings.)
Now open up XBMC and go to your video plugins menu. Its location will differ on every skin, but on the default skin it will be under Video > Video Plugins > BluRay. For Windows user, go to the bottom of the menu and choose Settings. Hit MakeMKV location and find your makemkvcon.exe file on your system -it’ll be where you installed MakeMKV (C:\Program Files\MakeMKV\makemkvcon.exe by default). Hit OK.
Step 3: Play your disc.
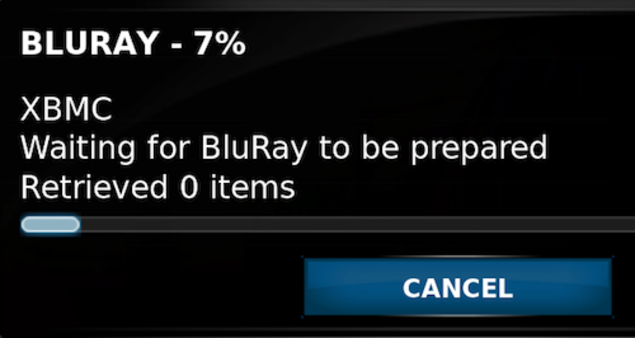
Now, whenever you want to play a Blu-ray disc, just go back to your Video Plugins in XBMC, hit BluRay, and choose Play Disc at the top of the menu (Videos > Plugins > BluRay > Play Disc). You’ll see the following window as your computer starts to decode the disc:

You won’t need to wait until the progress bar reaches 100%; it should only take 60 seconds or so before your movie automatically starts playing.
Original source:
https://lifehacker.com/5621471/how-to-enable-blu-ray-playback-in-xbmc
Solution 3: Rip Blu-ray into Kodi compatible digital formats
For those people who are looking for a simple workaround to play Blu-ray movies on Kodi with just few clicks, what you need is simply a Blu-ray Ripper software. Since commercial Blu-ray movies are usually protected with complicated protection, you will need to find a powerful one to assist you to strip that encryption.
After a lot of program testing and comparison, we finally settle on Pavtube ByteCopy. The program is equipped with powerful built-in disc discrypter which can facilitates you to automatically remove all Blu-ray copy protection and region code (A/B/C) in the background, you can then freely rip the content on Blu-ray disc to Kodi playable digital file formats such as AVI, WMV, MP4, QuickTime, MKV, etc. For those people who wish to preserve the original high definition quality in Blu-ray disc, you can choose to export Kodi playable HD file formats such as H.264 HD, H.265 HD with best quality and smaller file size.
Tips: The program supports hard-ware encoding acceleration, you can get up to 30x faster H.265 codec encoding speed as long as you run your computer on Maxwell (GM206) or Pascal based Graphic cards that supports Nvidia NVENC technology, or up to 6x faster H.264 codec encoding speed as long as you run your computer on Graphic Cards that supports Nvidia CUDA or AMD App technology.
Pavtube ByteCopy is available on is available on Windows 10, 8.1, 8 and 7, it is also accompanied by an up-to-date Mac version – Pavtube ByteCopy for Mac for macOS High Sierra, macOS Sierra, Mac OS X El Capitan, Mac OS X Yosemite and Mac OS X Mavericks. (Hard-ware encoding acceleration is not available for the Mac version).
Step by Step to Rip Blu-ray Movies for Kodi Playback
Step 1: Load Blu-ray disc.
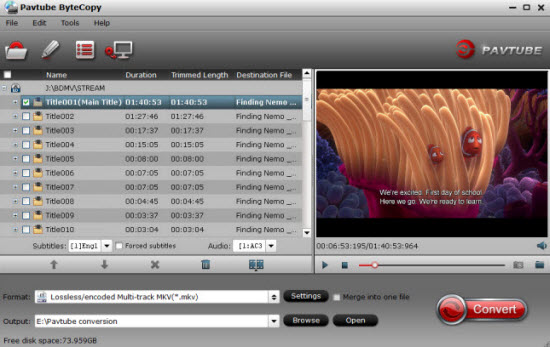
Insert the Blu-ray disc into your computer’s Blu-ray drive. If your computer doesn’t ship with a drive, you will need to purchase an external USB Blu-ray drive to read the data on Blu-ray disc. Then press “File” > “Load from disc” option on the main interface, alternatively, you can also import Blu-ray folder or Blu-ray ISO files with the program.

Step 2: Define the output format.
Clicking the Format bar, from its drop-down list, select Kodi playable HD file formats such as “H.264 HD Video(*.mp4)” under “HD Video” main category.

Step 3: Adjust output profile parameters.
Tips: click “Settings” on the main interface to open “Profile Settings” window, here, you can flexibly adjust the output profile parameters including video codec, resolution, bit rate, frame rate, audio codec, bit rate, sample rate, channels, etc as you like to get better output video and audio quality.

Step 4: Begin the conversion process.
After all setting is completed, hit the “Convert” button at the right bottom of the main interface to begin the conversion process from Blu-ray to Kodi playable HD file formats.
When the conversion is finished, click “Open Output Folder” icon on the main interface to open the folder with generated files. Then you can easily play converted Blu-ray movies on Kodi with no problems.


