


For those people who have sideloaded Kodi on your Fire TV/Fire TV 2, you can now directly view your personal media stored on an external hard drive within the Kodi app. It won’t be difficult for you to play local digital video on Fire TV 2 via Kodi from external hard drive, however, it would be a little complicated to get Blu-ray movies played on Fire TV via Kodi. The following article will share you a simple workaround to make that achieved.
Kodi supported file formats
To play Blu-ray movies on Fire TV via Kodi from external USB drive, you will need first need to rip Blu-ray to Kodi playable file formats listed below:
Container formats: AVI, MPEG, WMV, ASF, FLV, MKV/MKA (Matroska), QuickTime, MP4, M4A, AAC, Ogg, OGM, RealMedia RAM/RM/RV/RA/RMVB, 3gp
Video formats: MPEG-1, MPEG-2, H.263, MPEG-4 SP and ASP, MPEG-4 AVC (H.264), H.265 (as from Kodi 14) HuffYUV, MJPEG, RealVideo, RMVB, WMV
Audio formats: MIDI, AIFF, WAV/WAVE, AIFF, MP2, MP3, AAC, DTS, ALAC, AMR, FLAC, RealAudio, WMA
3D video formats: Passive 3D video formats such as SBS, TAB, anaglyph or interlaced
Here, you can get the job easily done by downloading Pavtube ByteCopy. The program can powerfully bypass the Blu-ray copy protection and region code in the background with its built-in disc decrypter, in addition, it also keeps constant update with perfect support for the new encryption such as MKB61 and MKB62 used on many recently released Blu-ray disc.
After the protection is removed, you can then easily easily rip Blu-ray disc, BDMV folder and also Blu-ray ISO files to any of Kodi playable digital file formats listed above. To get better output file quality, you can flexibly adjust output profile parameters such as video codec, bit rate, frame rate, resolution and audio codec, bit rate, sample rate, channels, etc as you like in the “Profile Settings” window offered by the program.
Related article: Plex VS Emby | Play Blu-ray with Kodi on Raspberry Pi 3 | View DVD ISO on Xbox One via Kodi
Set Blu-ray subtitles for Kodi playback
Since Kodi offers very powerful and customizable built-in subtitles functionality. Therefore, you can get better advantage of this great feature to play ripped Blu-ray movies on Kodi with rich subtitle features. Our application can assist you to better set Blu-ray subtitle during the ripping process. You can select desired subtitle from internal Blu-ray movies, enable forced subtitles to to disable the traditional subtitles while still preserving the subtitles that translate foreign language speaking parts periodically throughout the film to help you understand what they are saying. If the foreign language Blu-ray movie does not contain any language subtitles you understand, you can download a SRT/ASS/SSA subtitle file in your first language of the Blu-ray movie from a safe and reliable subtitle download site (such as opensubtitles.org) and add subtitles to Blu-ray movies.
For Mac users, you can switch to download Pavtube ByteCopy for Mac to complete the conversion on macOS High Sierra, macOS Sierra, Mac OS X El Capitan, Mac OS X Yosemite, Mac OS X Mavericks, etc.


Step by Step to Rip Blu-ray Movies for Fire TV Playback via Kodi
Step 1: Load Blu-ray disc.
Insert the Blu-ray disc into your computer’s Blu-ray drive. If your computer doesn’t ship with a drive, you will need to purchase an external USB Blu-ray drive to read the data on Blu-ray disc. Then press “File” > “Load from disc” option on the main interface, alternatively, you can also import Blu-ray folder or Blu-ray ISO files with the program.
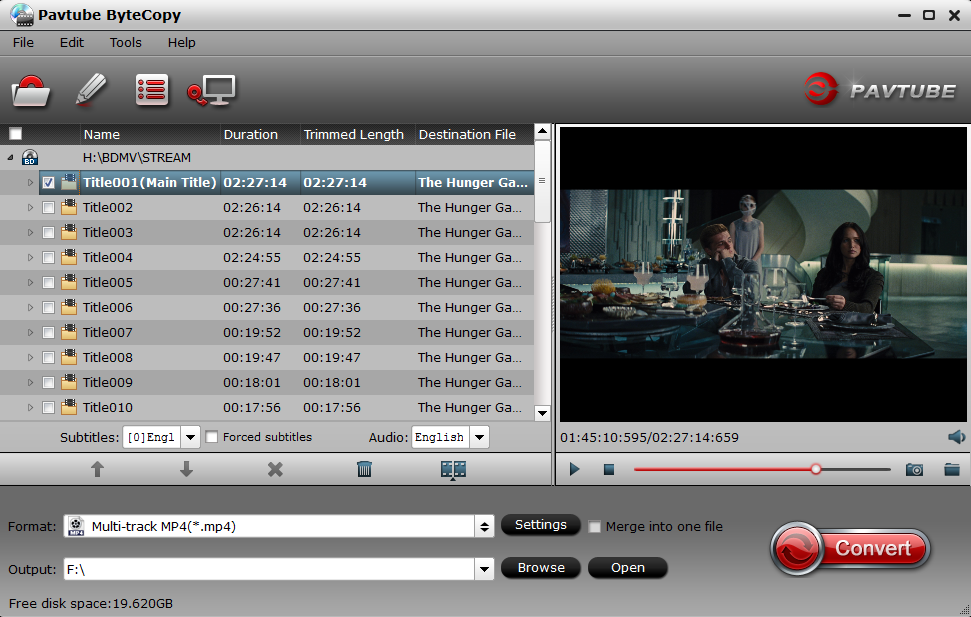
Step 2: Choose output file format.
Clicking the Format bar, from its drop-down list, select one of Kodi playback file formats such as “H.264 HD Video(*.mp4)” under “HD Video” main category.

Tips: To get Kodi supported audio file formats, just click “Settings” on the main interface to open “Profile Settings” window, in audio section, from “Codec” drop-down list, select one of Kodi playable audio formats such as “AAC” from its drop-down list.
Step 3: Set Blu-ray subtitles.
Select desired subtitles: Check the movie titles you want to rip, click the drop-down list of Subtitles, then all the subtitles into the Blu-ray will be shown clearly, so you can select your needed language as your subtitles freely.

Enable forces subtitles: if you check “Forced subtitles” option, you will see subtitles only when actors are speaking a language that are different from the subtitles that your specified before.

Add external subtitles: Click the “Pencil” like icon on the top too bar to open “Video Editor” window, switch to the “Subtitle” tab, check “Enable”, then you will be able to add external *.srt or *.ass/*.ssa subtitle-files to the video as hard subtitles.

Step 4: Begin the final conversion process.
After all setting is completed, hit right-bottom “Convert” button to begin to rip Blu-ray to Kodi supported digital file formats listed above.
When the conversion is completed, add converted files to Kodi for playing on Fire TV/Fire TV 2 from external USB drive.


