


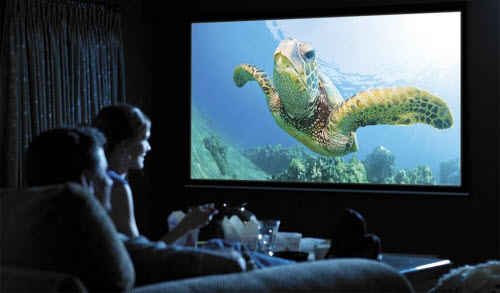
Movie tickets are becoming more and more expensive, and with quick home releases there are fewer reasons to make a trip to the theater. The good news is that you can put a movie theater in your home on the cheap with just a computer, a projector and a DVD disc. The following article will walk you through the steps to show DVD moves on home cinema with a projector.
Connecting to the projector
Connecting your computer to your projector to play a DVD is just like connecting it to play a PowerPoint presentation. Depending on your configuration, you can simply run a Video Graphics Adapter cable between the VGA ports on your projector and your computer, or use a High Definition Multimedia Interface cable between the HDMI ports on your computer and projector. Generally speaking, the HDMI cable will provide better video quality. If you are using a laptop, you might also need to press a special key combination to turn on its video output. While the key combination varies, it is usually either “Windows-P” or a combination of the “Fn” or “Function” key and one of the numbered F-keys like “F7,” “F8” or “F9.”
Playing the DVD on home cinena with Projector
Most computers have a built-in DVD drive and free DVD player software to play DVD disks. As such, simply insert the DVD in the drive and let the software play it. Once the DVD starts playing, you can usually select a full-screen mode by right-clicking anywhere in the image and navigating through the context menu that appears to find it.
Rip Commercial DVD for Playing on Home Cinema with Projector
Some of the DVD Player software may not powerful enough to handle store purchased commercial DVD movies with copy protection and region code. In addition, as disc encryption frequently changes, the developer of those free DVD player software may lacks the time and money to upgrade those free tool to bypass the new protections used on many new DVD movies. Fortunately, here comes Pavtube BDMagic, which can powerfully bypass all copy protection and region codec from DVD, so that you can make a digital copy from DVD in any of your desired file formats for viewing on computer with VLC, Windows Media Player, KMPlayer or other media player software on your computer. If you wish to copy DVD without any quality loss, you can also choose to make a 1:1 full disc copy of DVD with original structure or remux DVD to digital container file format without codec transcoding.
Hot Search: iTunes video to play on Home Theater Projector | Stream Netflix 4K to 1080p Projector | Play YouTube Video on Projector
Set DVD subtitles during ripping
To better go with the DVD movies when playing on Home Cinema with Projector, you can set DVD subtitles with our program in the following different ways: select your desired subtitle languages from original DVD movies, enable “Forced Subtitle” option to disable the traditional subtitles while still preserving the subtitles that translate foreign language speaking parts periodically throughout the film to help you understand what they are saying. If the foreign language DVD movie does not contain any language subtitles you understand, you can download a SRT subtitle file in your first language of the DVD movie from a safe and reliable subtitle download site (such as opensubtitles.org) and add subtitles to DVD movies.
For your convenience, this splendid DVD Ripping tool is available on both Windows and Mac platform (get Mac version). You can feel free to download and install it on your computer since it doesn’t feature any ads or bundled adware. In addition, the developer also keeps constant update of the program to work with the new Windows/Mac OS and also the ability to break the new disc encryption on many recently released DVD disc. Another great benefits of our program is that the output video and audio is quite high quality and you can’t find any difference between the output video and the original DVD disc.


How to Rip DVD for Home Cinema Playing with Projector?
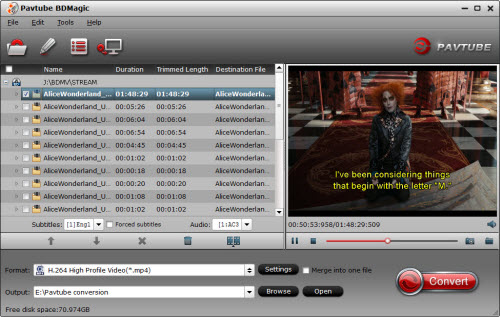
Step 1: Import DVD Movies.
Download, install and run this DVD ripper. You can load DVD by clicking “File” > “Load from disc”. Or load DVD Folder by clicking “File” > “Load from folder” or load DVD IFO/ISO image by clicking “File” > “Load IFO/ISO”.
Step 2: Choose output file format.
To copy DVD without quality loss, you can choose to make a full disc copy of DVD by hitting the “ ” icon on the top tool bar of the main interface.
Or remux DVD to one of your desired file format such as “”MP4 Remux Video(*.mp4)”under “Remux” main category.
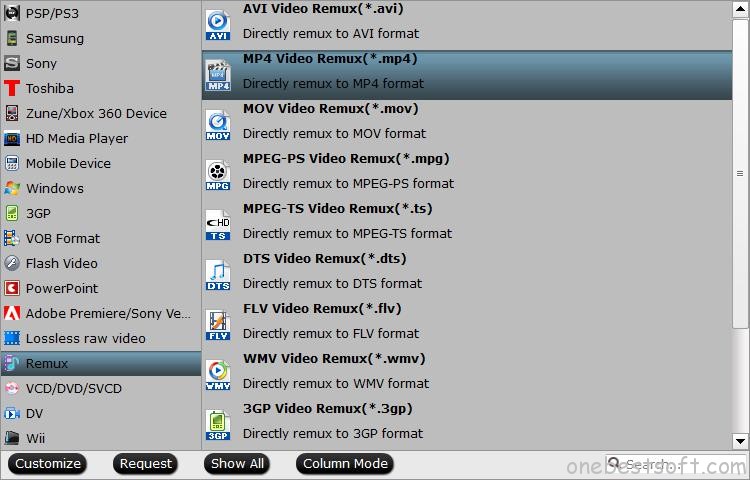
You can also output DVD to a popular digital file format such as “H.264 HD Video(*.mp4)” under “HD Video” main category for viewing with media player software on computer.

Step 3: Set DVD subtitles.
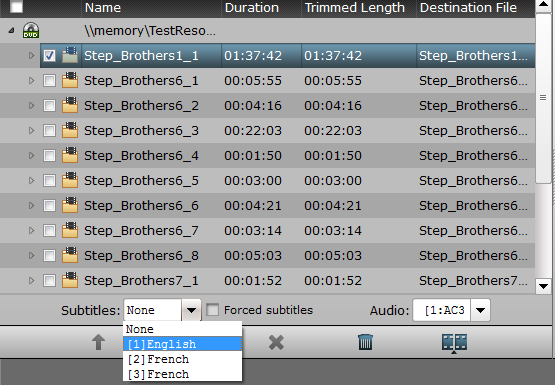
Select desired subtitles from DVD movies
Check the movie titles you want to rip. Click the drop-down list of Subtitles, then all the subtitles info in the Blu-ray/DVD movie will be shown clearly, so you can select your needed language as your subtitles freely.
Enable forced subtitles
Tick off “Forced subtitles” option, you will see subtitles only when actors are speaking a language that are different from the subtitles that you have specified before. For instance, if you specify English (your mother tongue) as your subtitles, and meanwhile tick off “Forced subtitles” option, then when actors are speaking English, no subtitles will show up, but when they are talking with each other in French, the English subtitles will appear accompanying with the French.

Add external subtitles
Open “Video Editor” window, switch to the “Subtitle” tab, check enable, then you will be able to load external SRT/ASS/SSA subtitles to your movies.

Step 4: Begin the conversion process.
After all setting is completed, hit the “Convert” button at the right bottom of the main interface to begin the process from DVD to your desired file format copying or converting process.
When the conversion is finished, click “Open Output Folder” icon on the main interface to open the folder with generated files. The you will have no limitation to stream DVD movies on Home Cinema with Projector with good viewing experience.
Further Reading:
Copy Blu-ray to MKV files for ATV4 on Video Projector
Enjoy Blu-ray on BenQ Projector With Room Environments
Rip 3D Blu-rays for BenQ W1070 1080P 3D Projector
How to stream BD/DVD movies to TV/Projector with multi-track using STB on Mac OS X
How to Watch DVD on Android Tablet Built-in Projector with MX Player?
Top 10 3D Projectors Reviewed – Compatible with 1080P 3D Movies


