


With QNAP NAS, you can synchronize your media library between the computers, laptops, and mobile devices then stream your media library via DLNA, Airplay & Chromecast at Home Theater system. Coping Blu-rays to NAS is a old topic, you can have the benefit of this way: you can protect your Blu-ray discs from damage and loss; you also needn’t search from the discs sea to find the one you want to play; by ripping Blu-ray to QNAP NAS, you can view it on TV, PC, Tablet, etc via QNAP NAS without needing Blu-ray Player.
Up to now, you must have some question, right? How to backup Blu-ray to QNAP NAS? What’s the best way to backup Blu-ray to QNAP NAS? Don’t worry, you can learn 3 methods to backup Blu-ray to QNAP NAS in this article.
Method 1: 1:1 Full disc copy of Blu-ray to QNAP NAS
Method 2: Lossless Rip Blu-ray to Uncompressed MKV Container
Method 3 Remux Blu-ray to QNAP NAS
Method 1: 1:1 Full disc copy of Blu-ray to QNAP NAS
To backup Blu-ray to QNAP NAS, you must get a pofessional third assistant. I highly recommend you Pavtube ByteCopy for Windows/Mac which can create intact Blu-ray folder backups from commercial Blu-ray disc movies for QNAP NAS, keeping M2TS streams with best audio & video quality, without losing Meta info like audio tracks, subtitle streams, chapter markers, etc. In order to create an intact Blu-ray folder keeping original file structure and movie quality, insert Blu-ray disc into the BD drive, launch Pavtube ByteCopy, press "Load from Disc" icon and select desired disc drive. The whole disc is selected once loaded, navigate to Output area and click "Browse" to specify a destination folder for the backup folder.

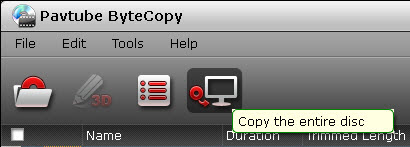
In the main screen, press "Copy the entire disc" button. The Conversion window appears.
In the Conversion window, you can find backup information like conversion process, time elapsed, time left, generated file size and estimated file size. If you don’t want to wait around for the entire backup procedure, you can tick off "Shut down computer after conversion" box.
Pavtube ByteCopy cracks Blu-ray copy-protections in a super fast speed, and sends the Blu-ray folder to your specified output path with everything in the original disc preserved. Practically speaking, even if running on a slower PC, it costs only about 1hour and 10 minutes to complete copying a 39.40 GB disc to QNAP NAS as a standard Blu-ray folder.
You can find the full Blu-ray backup folder in the destination folder by pressing the "Open output folder" tab in "Conversion" window or the "Open" button in main screen. The decrypted Blu-ray folder contains all information and contents in the original Blu-ray disc, divided into a BDMV folder and a CERTIFICATE folder.
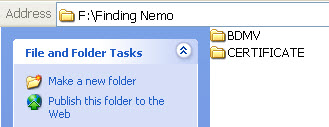
You can then transfer and put the Blu-ray folder to QNAP NAS for keeping.
Method 2: Rip Blu-ray to QNAP NAS in Uncompressed MKV Container Losslessly
For those people who want to preserve the lossless Blu-ray movie quality, this program allows you to remux Blu-ray to QNAP NAS with same movie quality without extra features. Just go with the following steps to achieve this goal.
Step 1. Run the program on your computer, import your Blu-ray disc by clicking "File" and "Load from disc".
Step 2. Click the format bar to follow "Multi-track Video" and choose "Lossless/encoded Multi-track MKV (*.mkv)".

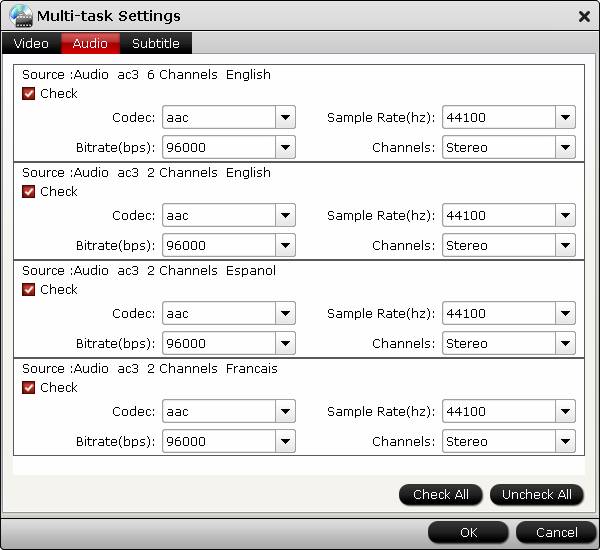
Step 3: Click "Settings" on the main interface to open "Multi-task Settings" window, all audio and subtitle tracks from the source Blu-ray files are checked and to be saved in the output MKV container by default, if there are some audio tracks or subtitle streams you don’t like, uncheck and remove them under the "Audio" and "Subtitle" tab. Here, the DTS-HD MA, TrueHD 7.1, Dolby 5.1 audio in original Blu-ray can be also kept.
Step 4: After finishing all the settings, go back to the main interface, press the right-bottom "Convert" button to start Blu-ray to lossless MKV with zero quality loss.
You can transfer the Blu-ray MKV to QNAP NAS then use VLC, KMPlayer and other MKV Players to play the lossless Blu-ray rips on Windows.
Method 3 Remux Blu-ray to QNAP NAS
Blu-ray remuxing is a lossless process that simply takes the video and audio streams from Blu-ray M2TS container and puts them into a new container like MKV, AVI, MP4, 3GP, etc. Remuxing is for those who don’t care that much about extras in the source Blu-ray discs and want to save space while having the movie in a new container so they can play the Blu-ray movies easily with any video player with the same quality as that of the untouched.
1. Install and launch this best Blu-ray remux program. Insert your Blu-ray disc into your BD drive, and click "Load from disc" icon to load your Blu-ray movies. You can also import movies files from Blu-ray disc, HD DVD disc, Blu-ray folder, ISO and DVD folder and DVD ISO/IFO.
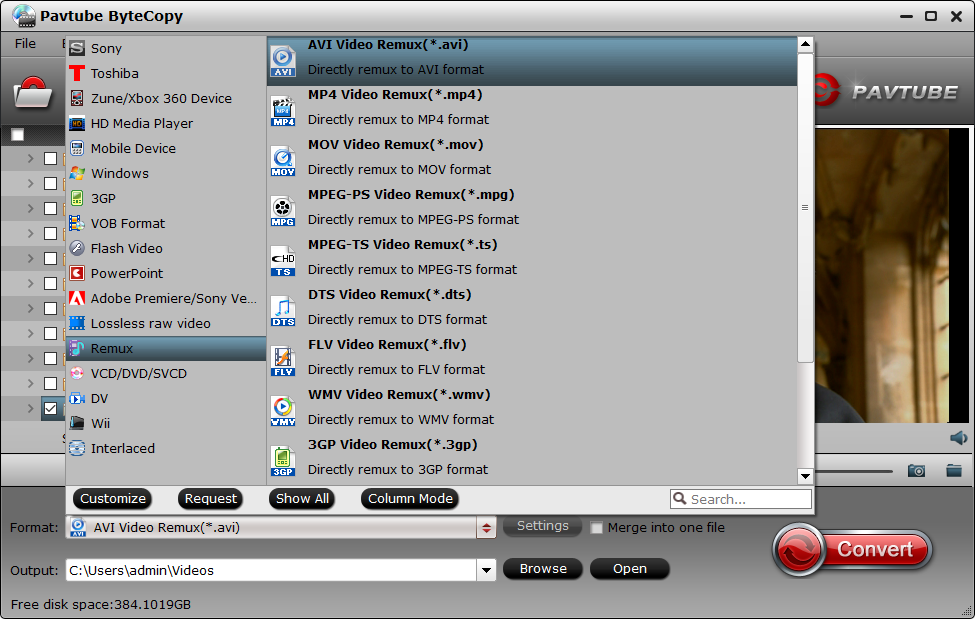
2: Click "Format" to open the drop-down window. In the remux category, you can choose which container to remux Blu-ray to. Here,we choose to remux Blu-ray to AVI.
3: Hit on the "Convert" button on the main interface to start to remux Blu-ray to AVI, MP4, MKV without quality loss. Once the process ends, open the output folder to locate the Blu-ray remux.
That’s it. A few minutes later you will have an AVI, MKV, MP4, etc file containing the exact video and audio streams of your Blu-ray disc.
Up to now, everything is so easy, right? Besides those three ways, you are able to copy the main title of the Blu-ray movies to massive devices to save more time. This program offers hundreds of devices optimized presets for you, like iPhone, Samsung, Android, PS4, and more. Other amazing features are waiting for your discovery.
Related Articles
Hot Articles & Reviews
- Backup Blu-ray/DVD to QNAP TS-531P NAS in Different Ways
- How to Copy/Backup Commercial Blu-ray/DVD to QNAP TAS-168/TAS-268?
- Backup Blu-ray/DVD to Seagate Personal Cloud
- Streaming "Avengers: Age of Ultron" Blu-ray to Seagate Central for Viewing
- Backup Blu-ray/DVD to QNAP HS-251 for Better Storage and Playback
Any Product-related questions?support@pavtube.com