Copy Blu-ray to Video Hard Drive

Leave a comment

With 300+, 500+, 1000+ Blu-ray discs covered by dust on the shelf, you maybe get annoyed that how you should deal with these large number of Blu-ray discs. What’s more, it is difficult to find the one disc you want from the hundreds even thousands of Blu-ray discs. It will save you if you choose to rip Blu-ray to video hard drive. By this, you can migrate your Blu-ray collection to basement or attic and the best part is that you can easily search the movie you want in the hard drive.

It will be more convenient to stream Blu-ray movies when you copied Blu-ray library to video hard drive. You can stream Blu-ray on Xbox One S, PS4 Pro, Smart TV, etc without Blu-ray Player and you never need to worry about the Blu-ray region codes. So how to rip Blu-ray to video hard drive? With Blu-ray Ripper, it will be easy to get done.

Best Blu-ray Ripper Recommended

Pavtube BDMagic is recommended here to help you decrypt Blu-ray AACS, BD+, MKB v61, MKB V62 to copy Blu-ray discs to video hard drive. You can choose to 1:1 backup Blu-ray to video hard drive in Blu-ray BDMV folder and directly copy Blu-ray to M2TS files to video hard drive. Of course, it is suggested to convert Blu-ray to MP4, MKV, AVI and other digital files to store on video hard drive cause in this way, you can watch Blu-ray movies on devices with USB port from video hard drive.

For Mac users, please use the equivalent Mac Blu-ray RipperPavtube BDMagic for Mac. In addition, if you want to copy Blu-ray to lossless MKV to video hard drive, you can choose Pavtube ByteCopy cause this Blu-ay Ripper is a multi-track Blu-ray Ripper that can rip Blu-ray to lossless/uncompressed MKV and MP4/MOV/AVI with mutltiple subtitle and audio tracks.

Free download and install:


Other Download:

– Pavtube old official address: http://www.pavtube.cn/blu-ray-ripper/
– Cnet Download: http://download.cnet.com/Pavtube-BDMagic/3000-7970_4-75922877.html

Steps to rip Blu-ray to video hard drive

Step 1. Import Blu-ray movies

Insert your Blu-ray to Blu-ray drive. Open this Blu-ray Ripper to load Blu-ray movies. This Blu-ray Ripper also can rip DVD to video hard drive, so you can add DVD movies, too.

Step 2. Choose output format

Click “Format” bar and select one of the formats you like. Or select a format depending on which device you want to watch the movie in.

There are two options: “Copy the entire disc” and “Directly Copy”. “Copy the entire disc” means copy the whole content of disc with the same structure with the original disc. “Directly Copy” means copy the selected movie title.

Step 3. Rip and copy Blu-ray to computer

Just click “Convert”button, after a while, it will finish the conversion from Blu-ray to your computer.

Once the ripping process ends, open the output folder to locate the Blu-ray rips and then transfer the Blu-ray rips to video hard drive to view the Blu-ray movies on TV, PS4, etc.

Related Articles:

Copy DVD to Multi-track MP4 for Plex/TV

Leave a comment

A multi-track MP4 means that the video extension is MP4 format and the video contains multiple subtitle and audio streaming tracks. A DVD video usually includes English, Chinese, Spanish… several language streaming. Ripping DVD to multi-track MP4 can preserve all or several subtitle and audio tracks. Then you can watch the multi-track MP4 DVD rips on TV via Plex with your preferred subtitle and audio track and can switch to another track anytime as you like.

So how to convert DVD to MP4 with multiple subtitle and audio tracks? To get the goal, you need to get a DVD Ripping software that can keep multi-track subtitle and audio streaming. In the market, there are many DVD Rippers but few multi-track DVD Ripping tool. Fortunately, Pavtube Bytecopy can help you copy DVD to multi-track MP4 with subtitles and audio.

It is special designed for users to rip Blu-ray/DVD to MKV/MOV/MP4 with multiple audio and subtitle tracks for your Plex/TV streaming. Moreover, it’s also a professional Blu-ray/DVD ripper, allows you to rip and convert Blu-ray/DVD discs to any other video format you like such as converting DVD to AVI, WMV, FLV, TS, etc. Intimate is, there are many optimized presets for tablet and smartphone, including Kindle Fire HDX, Google Nexus 6P, Galaxy S7, iPad Pro, Surface Pro 4, Xbox One S, PS4 Pro, etc which will give you best video quality.

Free download and install: 
 

Mac version is also available: Pavtube Bytecopy for Mac

How to Copy DVD to Multi-track MP4 for Plex/TV?

Step 1. Import DVD disc, DVD folder, IFO/ISO image files. 

Step 1. Free download and install Pavtube ByteCopy on your PC. Insert DVD disc to your ROM, click “Load files” to import DVD disc directly from ROM. If you have IFO/ISO and DVD folder, choose the corresponding option to load DVD movies from your computer. 


The main title in your DVD will be checked by default; so let’s move on and choose format.

Step 2. Choose format.

Click the “Format” drop-down list and choose “Multi-track Video>Multi-track MP4(*.mp4)” as below: 


Step 3. Adjust video&audio settings (optional) 

Click the “Settings” button to check all video&audio settings. By default it will check all the audio tracks (languages), so if you only need some of the languages, just check the unwanted ones. 

Btw, video size, bitrate and frame rate can all be changed if you are not satisfied with default settings. 

Don’t forget to click OK to confirm all the changes.

Step 4. Start conversion. 

Click the big red “Convert” to start converting DVDs to MP4 with multiple languages. The original DVD chapter marker will be kept automatically. 

After conversion, hit the “Open” or “Open output folder” icon to quick locate converted MP4 videos. Then, you can put the MP4 files into the sharing folder of Plex then streaming on HD TV.

Money saving bundles

ByteCopy($42) + Video Converter Ultimate($65) = Only $79.9, Save $27.1 
ByteCopy($42) + DVD Creater($35) = Only $44.9, Save $32.1 
ByteCopy($42) + Vidpie($29) = Only $54.9, Save $16.1
ByteCopy($42) + MXF MultiMixer($45) = Only $69.9, Save $16.1

Related Articles:

50% off Spirit Halloween Coupon from Pavtube

Leave a comment

Movie makes life more wonderful, especially at Halloween. You can record your own Halloween films then edit these Halloween footage in Final Cut Pro/iMovie while upload your personal Halloween production to YouTube, Vimeo, Instagram. The best part is that you won’t meet any trouble in this creation with the help of Pavtube Blu-ray/DVD/Video tools.

Pavtube 2016 Halloween Promotion

Pavtube Studio is holding 2016 Halloween Promotion activity where you can get cheap but professional Blu-ray Ripping tools, DVD Riping tools and video converters. Then, you don’t need to worry that your iMovie export can’t be uploaded to YouTube or your HD camcorder/camera recordings can’t be imported to NLE software. Now, let’s see Pavtube 2016 Halloween Promotion in detail.

Index of Pavtube 2016 Halloween Promotional Notices

Promotional Items | Halloween Software Bundles | Software Compare

Pavtube Promote Products in 2016 Halloween


Video DVD Ultimate

Video Converter Ultimate

Get The equivalent Mac version – Pavtube iMedia Converter for Mac

DVDAid

Get The equivalent Mac version – Pavtube DVDAid for Mac

Pavtube 2016 Halloween Promotion Software Bundles


ByteCopy + Video Converter Ultimate

Original Price: $107

Now: $79.9

Video Converter Ultimate + ChewTune

Original Price: $94

Now: $74.9

ByteCopy + ChewTune

Original Price: $71

Now: $54.9

Video Converter Ultimate + DVD Creator

Original Price: $100

Now: $64.9

BDMagic + DVD Creator

Original Price: $84

Now: $49.9

ByteCopy + DVD Creator

Original Price: $77

Now: $44.9

Compare Pavtube Halloween Special Offers


Software Compare Pavtube Video Converter Ultimate

Pavtube Video DVD Converter Ultimate

Pavtube DVDAid

List Price

$65 $49 $35
Discounted Cost $52 $24.5 $21

Supported Source

Blu-ray    
DVD (Protected & Unprotected)
MKV, AVCHD (MTS, M2TS), MOD, TOD, TS, AVI, YouTube/Facebook video, WMV, MPEG, MP4, H.264, MOV, VOB,WebM, VPX8, etc.  

Output Formats

MP4, H.265, H.264, MPEG, AVI, WMV, VOB, MOV, FLV, iPhone, iPad, Android, Windows Phone, Surface, PSP, etc.
3D MKV/AVI/MOV/WMV/MP4
4K H.265 MKV/MP4
DVD folder, single MPEG2 file with lossless video quality and 5.1 Channel AC3/DTS Dolby audio.
Blu-ray folder, single M2TS file with lossless video quality and 5.1/7.1 Channel AC3/DTS Dolby Digital, Thrue HD audio.    

Other Functions

Edit parameters, rotate, merge, crop, trim and split video
Add SRT/ASS/SSA subtitles and remove audio from video

Convert 2D to 3D video

Src: http://i-loveshare.com/pavtube-2016-halloween-promotion/

Read More About Halloween

Insert MP4 video into PowerPoint 2016, 2013, 2011, 2010, 2007…

Leave a comment

You perhaps originally thought that if you want to insert MP4 files to PowerPoint, you just need to click Insert tab of the ribbon, on the Media panel, choose the arrow under Video, and then choose the appropriate command for inserting your file. But quickly, you maybe get a message "PowerPoint cannot insert a video from the selected file". Does’t PowerPoint support MP4 files? Well, it depends.

Insert MP4 to PPT

Does PowerPoint 2016, 2013, 2011, 2010, 2007… support MP4 Files?

For PowerPoint 2016 and PowerPoint 2013

Video:    In PowerPoint 2013 and later, for the best video playback experience, we recommend that you use .mp4 files encoded with H.264 video (a.k.a. MPEG-4 AVC) and AAC audio. In PowerPoint 2010, we recommend that you use .wmv files.

Audio:    We recommend using .m4a files encoded with AAC audio. In PowerPoint 2010, we recommend that you use .wav or .wma files.

For PowerPoint 2010: Though PowerPoint 2010 announced to embed and play MP4 files, it has some limitations: 

  • You need have the QuickTime player installed on your computer and you can only insert an Apple QuickTime movie (.mov, .mp4) file to PPT 2010. 
  • The PowerPoint 2010 64-bit version is not compatible with 32-bit versions of QuickTime. You must install a 64-bit version of QuickTime, or a 32-bit version of PowerPoint 2010. 

For PowerPoint 2007, 2003 or lower version: 

According to Microsoft PowerPoint official website, PowerPoint 2007, 2003 or lower version only supports WMV, AVI, ASF, and MPG/MPEG four video formats. If you import other video formats like MP4 to those version of PowerPoint, it will end in fail.

Office.com gives people the solution to add MP4 files to PowerPoint 2016, 2013, 2011, 2010, 2007… saying

If PowerPoint doesn’t let you insert a video or audio file, you can fix the problem in a few steps and a modest amount of time. The simplest way to fix this situation is to take these three steps, which are described in this article:

  1. Find and download a file converter.

  2. Convert your video or audio file to a common format that PowerPoint understands.

  3. Insert the converted video file in your slide.

So obviously, Micro software company makes you convert MP4 video for PowerPoint 2016, 2013, 2011, 2010, 2007…

How to Convert MP4 Files to PowerPoint 2016, 2013, 2011, 2010, 2007… ?

MP4 Video Converter Needed:

Pavtube MP4 Video Converter can convert all video files. On the one hand, it can convert H.265 MP4, MPEG-4, H.264 MP4 to PPT supported WMV, AVI, ASF, and MPG/MPEG and other other hand, it can transcode virtually any video to H.264 MP4 for PowerPoint 2016, 2013, 2011, 2010, 2007…

With built-in video editor, you can trim MP4 video footage, merge MP4 video to a whole one file, split MP4 files to separate files, crop black area in videos, etc. Besides, you can add external subtitles to MP4 files and compress 4K MP4 files to 1080p/720p/540p/480p MP4 for PPT.

Let’s Start

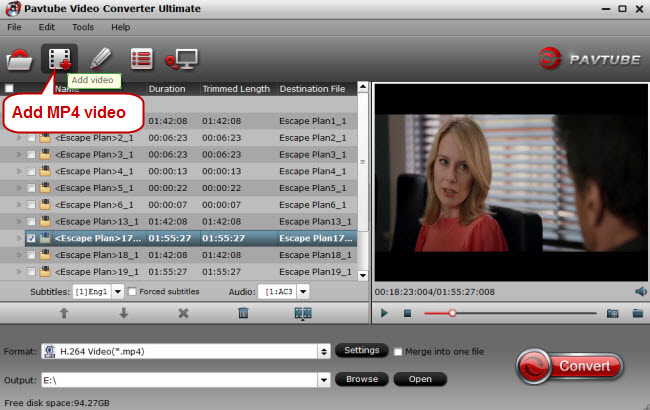
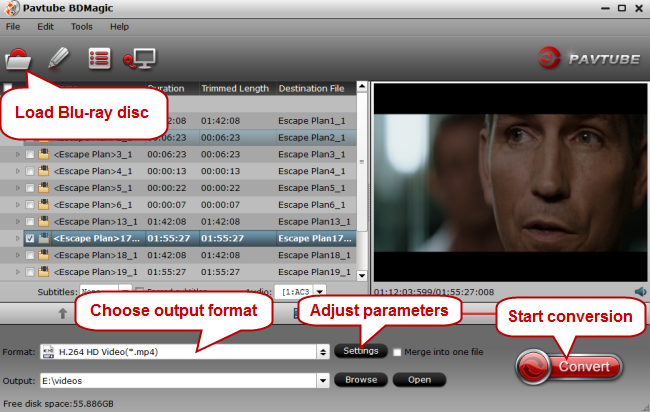
Step 1. Once you have successfully launched the software, the very next step is to load the video MP4 file that you want to convert. There are two methods with which you can load the files. You can add the files easily by dragging it into the interface or by clicking on the “Add Files” button located at the top. Once you have clicked on the “Add Files” button, it will open a file explorer from where you can choose the desired MP4 video file for conversion

add mp4 video

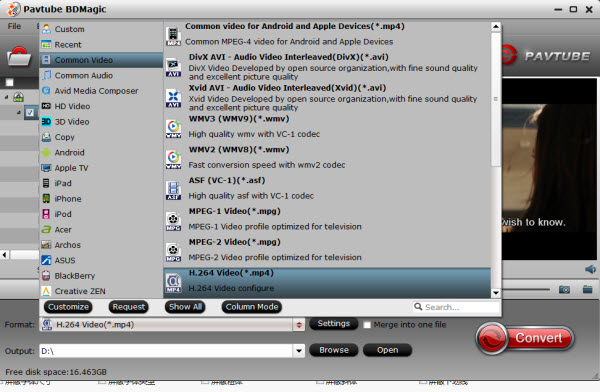
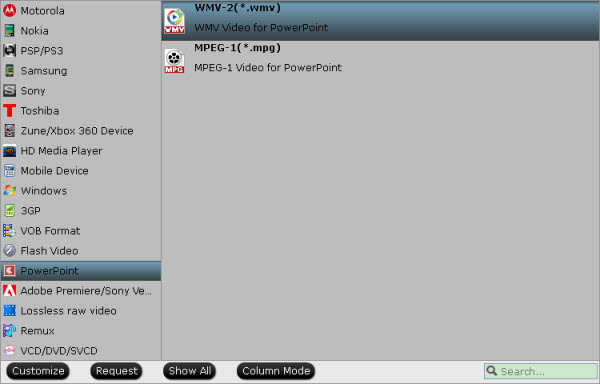
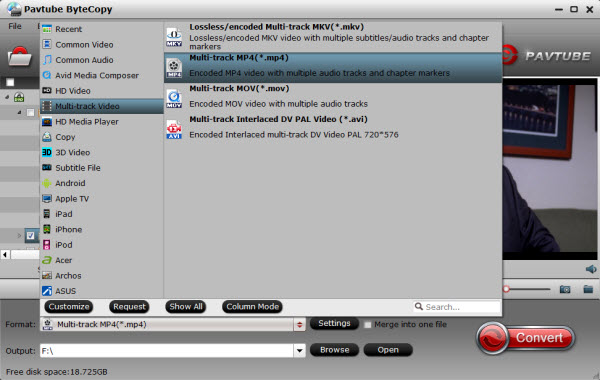
Step 2. Choose the PowerPoint supported formats in the “Output Format” dropdown list. You can go to “Format” -> “Video” and find “MPEG-1 Video (*.mpg)” which works well with both Windows and Mac version of PowerPoint. What’s more, WMV or AVI is well supported by PowerPoint for Windows; MOV is well supported by PowerPoint for Mac.

PPT fromat

Tips:

1. You can click “Settings” to change audio channel, change video resolution, adjust bitrate, etc. 

2. You can edit the videos according to your requirement. This step is optional and can be omitted if not needed. Click on the “Edit” button at the right side of the video to start editing it.

Step 3.The final step is to start converting MP4 to PowerPoint WMV, MPEG-1 or MOV with highest quality and fastest speed by clicking on the “Convert” button at the bottom of the screen.

The ways to insert videos to PowerPoints is somewhat different according to your PPT versions. Now, let’s show you how to add video to PowerPoint 2016, 2013, 2011, 2010, 2007…

Add and play a video in a presentation 2016/2013

Add and play a video in a presentation 2010

Add and play a video in a presentation 2007

Add and play a video in a presentation 2016/2013

Insert a video stored on your PC

  1. In Normal view, click the slide that you want the video to be in.

  2. On the Insert tab, click the arrow under Video, and then click Video on My PC.

  3. In the Insert Video box, click the video that you want, and then click Insert.

Link to a video stored on your PC

  1. In Normal view, click the slide where you want the link to the video to be in.

  2. On the Insert tab, click the arrow under Video, and then click Video on my PC.

  3. In the Insert Video box, click the file that you want to link to, click the down arrow next to the Insert button, and then click Link to File.

    Shows Insert Video dialog in PowerPoint

NOTE: In addition to inserting or linking to a video on your PC, in PowerPoint 2013 and PowerPoint 2016, you can insert or link to a video on YouTube. For more information, go to Insert or link to a video on YouTube.

Add and play a video in a presentation 2010

Insert a video in your presentation

  1. In Normal view, click the slide in which you want to embed the video.

  2. On the Insert tab, in the Media group, click the arrow under Video.

  3. Select Video from file, and then browse to the location of your video, and select it.

  4. On the Insert button, click the down arrow, and then click Insert.

Add a link to a video

  1. On the Slides tab in Normal view, click the slide to which you want to add a video or animated GIF file.

  2. On the Insert tab, in the Media group, click the arrow under Video.

  3. Select Video from file, and then browse to the location of your video, and select it.

  4. On the Insert button, click the down arrow, and then click Link to file.

    Link to a video file

NOTE: To set the ‘Play’ options for your linked video, see Set the ‘Play’ options for a video.

Add and play a video in a presentation 2007

To prevent possible problems with links, it is a good idea to copy the movies into the same folder as your presentation before you add the movies to your presentation.

  1. In Normal view, click the slide to which you want to add a movie or animated GIF file.

  2. On the Insert tab, in the Media Clips group, click the arrow under Movie.

    Insert tab image

  3. Do one of the following:

    • Click Movie from File, locate the folder that contains the file, and then double-click the file that you want to add.

    • Click Movie from Clip Organizer, scroll to find the clip that you want in the Clip Art task pane, and then click it to add it to the slide.

      TIP: You can preview a clip before you add it to your presentation. In the Clip Art task pane, in the Results box that displays the available clips, move your mouse pointer over the clip’s thumbnail, click the arrow that appears, and then click Preview/Properties.

Related Articles:

Best AVI to MP4 Converter for macOS Sierra

Leave a comment

AVI is a container that can hold different types of video and audio streams inside, and with the help of DivX® video compression technology, they can display incredible video quality while maintaining a small file size. However, AVI is not a wide compatible format that many devices don’t support it. For example, some Panasonic DVD Players can’t play AVI format. In short, you need to convert AVI to MP4 in many cases, which pushes you to find a AVI to MP4 converter. Relatively, a windows AVI to MP4 converter is easier to get so here we would gathered top 3 AVI to MP4 converters for macOS Sierra.

Tables of Top macOS Sierra AVI to MP4 Converter

Top 1: Pavtube iMedia Converter for Mac is the best BD/DVD/Video solution on macOS Sierra to backup BD/DVD, compress disc and transcode video clip to almost all popular video and audio formats like m3u8, H.265/HEVC MP4, MKV, M4V, AVI and play on iPad Mini 4, iPhone 7, Samsung Galaxy S1, PS4, Xbox One S, HD media players, and more. In addition, Pavtube software provided you batch processing facility that allows multiple video conversions at the same. Read the top 5 reasons to choose Pavtube iMedia Converter for Mac.

Top 2: Any Video Converter for Mac is a fantastic piece of freeware that can handle conversions to everything from DivX and MPEG4 to VOB and more than 60 other input formats, all within an attractive and minimalist interface that’s trouble-free and pleasing to navigate without being overly daunting. The software features user-defined video outputs, as well batch processing for converting multiple files simultaneously, and saves all converted video to a pre-designated folder for quick access and organization.

Top 3: Aiseesoft Video Converter Ultimate for Mac is powerful DVD video converting software, which can convert home-made DVD and videos to MP4/AVI/WMV/3GP/MOV/FLV/ MP3/FLAC/WAV video or audio formats for playing on prevailing devices and further editing on well-know editing software. For playing on TV, it also can convert video to 3D video formats, which allows you to select 3D audio modes. Moreover, it has download function, which helps users download videos on internet can convert them to proper video formats as needed. 

Learn >> Video Codes Explained

Comparison of AVI to MP4 Conversion Functions

Video Converter Pavtube iMedia Converter for Mac Aiseesoft Video Converter Ultimate for Mac Any Video Converter for Mac
Supported Input Files
SD/HD/4K Video Yes Yes H.265 video unsupported
DVD Yes Yes Yes
Blu-ray Yes Not support 4K Blu-ray Yes
Ouptut File Formats
DivX/XviD/AVI Yes Yes Yes
1080p/720p MP4 Yes Yes Yes
4K H.265 MP4 Yes Yes Yes
3D SBS/TB MP4 Yes Yes No
3D SBS/TB AVI Yes Yes No
MKV/WMV/FLV Yes Yes Yes
3GP/VOB/MOV Yes Yes Yes
Custom Tool
Trim/Split/Merge/Crop Yes Yes Yes
Adjust A/V parameters Yes Yes Yes
Adjust aspect ratio Yes Yes Yes
Batch Conversion Yes Yes Yes
Add subtitles to video Yes No Yes

Similar Seach: macOS Sierra VR Video Converter | macOS Sierra Video Converter

Editor’s Choice

Especially, we want to praise Pavtube iMedia Converter for Mac for its multiple functions for Mac. This professional video converter integrates all the functions of Blu-ray Ripper + DVD Ripper + Video Converter + Audio Converter. It not only can convert AVI, MKV, FLV, VRO, Tivo, AVCHD, MTS, MXF to MP4, but also can rip Blu-ray and DVD to MP4. It is also regraded as the best 4K Video Converter for macOS Sierra to compress 4K to 1080p/720p and upsale SD/HD video to 3840p/2160p video on Mac OS X 10.12 macOS Sierra, Mac OS X 10.11 El Capitan, Mac OS X 10.10 Yosemite, 10.9 Mavericks, 10.8 Mountain Lion, 10.7 Lion, 10.6 Snow Leopard, 10.5 Leopard.

Screenshot

Availability 


Related Articles:

Pavtube Blu-ray Ripper Upgraded Supporting Blu-ray MKB v62

Leave a comment

It is more and more difficult to decrypt Blu-ray discs because they have higher and higher encryption scheme. For those who love to rip Blu-ray to digital files to stream on portable devices, TVs, game consoles over network, it is the time to upgrade your Blu-ray Ripper to have the power to decrypt the most complex Blu-ray encryption – MKB v62. If you are a user of Pavtube software, you are a lucky man.

Pavtube Upgrade Support MKB v62

Today, Pavtube Studio has upgraded his main 3 Blu-ray ripping tools to support the new Blu-ray encryption MKB v62. If you are the customer of Pavtube product, you can get the upgrade free to get the technology of decrypting MKB v62. Of course, this upgrade won’t affect the original functions of Pavtube Blu-ray Rippers to break down Blu-ray encryptions including AACS, BD+,UOP,DRM, HDCP, BD-ROM, Region codes, MKB v61, etc.

These three Pavtube Blu-ray Ripping tools are exactly Pavtube BDMagic, Pavtube ByteCopy, Pavtube Video Converter Ultimate.Now, let’s learn the upgrade and the main features of each Blu-ray ripping tool.

What’s new?

1.support latest Blu-ray MKB v62.

2.fix some bugs.

Key features of ByteCopy

– 1:1 backup BD/DVD with original video structure.

– Main title copy BD/DVD with smaller size.

– Copy BD/DVD to MKV with lossless quality.

– Convert BD/DVD to MP4/MOV/AVI with multiple subtitle/audio streaming.

More functions of ByteCopy is in the review.

Key features of BDMagic

– Full copy and directly copy Blu-ray and DVD

– Convert Blu-ray/DVD to SD/HD MP4, MKV, AVI, etc to NASMedia Server, etc.

– Convert 4K Blu-ray to H.265/HEVC 4K MP4/MKV

– Rip Blu-ray preserving AC3, AAC, DTS audio in stereo, 5.1, 7.1 sound.

More functions of BDMagic is in the review.

Key features of Video Converter Ultimate

– Decrypt Blu-ray and DVD to virtually any SD/HD video

– Convert 4K Blu-ray to SD/HD MP4, WMV, MOV, QuickTime, ProRes for editing in NLE.

– Copy Blu-ray/DVD to M3U8 for HTTP live streaming

– Convert, shrink, compress Blu-ray, DVD to YouTube, FaceBook, Vimeo, Instagram, Google Plus, etc.

More functions of Video Converter Ultimate is in the review.

The Blu-rays you can Decrypt:

You can use Pavtube Blu-ray Ripper to decrypt some new released Blu-ray including: The Walking Dead, Stranger Things, The RevenantThe MartianHannibal TV Series, Game of Throne (1-6), Spectre 007Zootopia, Harry Potter, Independence Day, The Divergent Series: Allegiant, The WalkAvatarHouse of Cards, Bridge of Spies, Mad Max: Fury Road, Room, Spotlight, By the Sea, The Family Fang, Absolution, Roots, Code of Honor, Now You See, The Adderall Diaries, Arch Angels, Shchedrin: The Left-Hander, Sherlock, Ghost Rider / Hellboy, The Da Vinci Code, The Da Vinci Code, Doro: Strong and Proud, etc.

Src: http://www.love-media-player.com/pavtube-upgraded-supporting-mkb-v62/

Rip DVD to Emby Media Server for Sharing and Streaming

Leave a comment

Emby Media Server has many client apps including: Kodi, Windows Media Center/XBOX 360 (MCE Extender), Android TV, Roku/Now TV boxes, Amazon Fire TV, some Samsung Smart TVs. This means when you copy DVD library to Emby media server, you can stream DVD movies with Kodi, WMC, Roku, etc. However, Emby will only playback Video_TS on a PC (Emby for WMC).The same goes for .iso rips of DVDs. So when you want to put DVD movies to Emby for streaming, you’d better convert DVD to MKV/MP4.

Extracting MP4/MKV from DVD discs makes you stream DVD movies with Kodi, Roku, Android TV via Emby cause even though Emby supports DVD video-ts, its clients don’t suppot it. So how to rip DVD to Emby Media Server? You can use a DVD Ripper to help you rip commercial DVD discs to Emby Media Server. 

Here I recommend you Pavtube ByteCopy <review>. This DVD ripping tool is the most impressive, yet easy-to-use and covers all your needs regarding a program to rip bluray and DVD discs. It can easily rip any copy & region protected DVD to Emby Media Server in digital version. It outputs MP4, MKV, AVI, FLV, 3GP, H.265, M3U8, etc with original video quality so that you can stream DVD via Emby Media Server on Amazon Fire TV, Samsung Smart TV, etc.

Thus, you also can use Pavtube ByteCopy to rip Blu-ray to Emby Media Server by decrypt Blu-ray AACS, BD+, up to MKB v61. Learn >> Plex vs. Emby With Kodi

Free download and install: 
  

Other Download: 
– Pavtube old official address: http://www.pavtube.cn/bytecopy/ 
– Cnet Download: http://download.cnet.com/Pavtube-ByteCopy/3000-7970_4-76158512.html 

How to Copy DVD to Emby Media Server for Sharing and Streaming?

Step 1. Load DVD movies

Insert your DVD disc into your DVD drive, run the best DVD Converter for Emby Media Server and click “Files” icon to load movie from DVD source(Disc, folder, ISO). Set your wanted subtitles and audio track from the drop-down box of “Subtitles” and “Audio” tab. The mac version isPavtube ByteCopy for Mac

Note: DVDs encoded with any region codes can be imported to rip and your Netflix rented DVDs are also supported.


Step 2. Choose output format

Click the “Format” option, and choose HD Video > H.264 HD Video(*.mp4) or MKV HD Video(*.mkv) as output format. MOV, MKV, AVI, etc can also be found in “HD Video” and “Common Video”. You also can choose other multimedia container/format from the profile.


Tip: 

If you like, you can click “Settings” to change the video encoder, resolution, frame rate, etc. as you wish. Keep in mind the file size and video quality is based more on bitrate than resolution which means bitrate higher results in big file size, and lower visible quality loss, and vice versa.   

Note: If you want MKV files, you can choose lossless MKV from “Multi-track Video” to preserve the original video quality. 


Step 3: Start to copy DVD to Emby

Click the convert button under the preview window, and the DVD ripper will start the conversion from DVD movies to MKV/MP4 for Emby Media Server.

Once the conversion ends, you can locate the generated MP4/MKV files in output folder. Put DVD rips into sharing folder of Emby, then you can stream the converted DVD movies through Emby Media Server to iPad Pro, Samsung UHD TV, Roku, Xbox 360, PS4 Pro, PS4 or other DLNA-compliant devices for watching. 

Related Articles:

Convert DVD to AVI With VirtualDub Alternative

Leave a comment

Many people choose to VirtualDUB to rip DVDs to AVI. When copying DVD with VirtualDUB, you don’t need installing, just extract the archive and run ‘VirtualDub.exe’. In addition, there are some disadvantages to use VirtualDUB to rip DVDs: 1.You do need to separately download the MPEG2 plugin (required to decrypt DVDS); 2. VirtualDUB needs a lot more configuration to get started. With a VirtualDUB alternative, the process of DVD to AVI process will be much easier.

Get VirtualDub Alternative

Pavtube ByteCopy can alter VirtualDUB to convert DVD to AVI. Pavtube ByteCopy can decrypt DVD by removing DVD encryption including CSS, region code, RCE, Sony ArccOS, UOPs, Disney x-project DRM, etc. When you’re ready to rip your DVD, start Pavtube ByteCopy and tap into your registration codec (trial version needs clicking Trial). Then click File>Open Video File – Now you need to navigate to your DVD and click VTS_01_1.VOB (this is usually the first video file on a DVD). After the DVD loaded, you can choose ouput format, your wanted AVI format, from "Format" then start DVD to AVI process by clicking "Convert". The conversion speed will be very fast that you don’t need to wait for a long time.

Pavtube ByteCopy exports various AVI video from DVD files, you can choose to:

Rip DVD to DivX/XviD AVI

Convert DVD to 1080p/720p AVI

Transcode DVD to 3D SBS AVI

Decrypt DVD to AVI with multiple subtitle and audio tracks.

What’s more, you can edit your video before outputing AVI files. In the built-in video editing editor, you can trim, crop, merge, split video and hardcode external subtitle to video, etc. If you want to copy DVD to AVI on Mac, the equivalent Mac version which supports OS X El Capitan, Yosemite, Mavericks, etc

Free download and install: 
 

How to Use VirtualDub Alternative to Rip DVD to AVI?

Step 1: Import DVD video and select language & subtitle for output

Insert DVD into disc drive, and load it into VirtualDub Alternative. Or add DVD video from DVD folder from computer. And then choose one audio track for main sound language and one subtitle track for display in output file.

Step 2: Choose output AVI video format

In order to convert DVD to AVI, you are suggested to choose “Xvid AVI – Audio Video Interleaved(Xvid)(*.avi)” as output format. If you require for high quality, “DivX HD(*.avi)” would be a great choice.

Learn >> Multimedia Container Formats

Step 3: Convert DVD to AVI

Preview the video in Pavtube built-in media player, and hit on the “Convert” button to start converting DVD to AVI. Pavtube VirtualDub Alternative would complete the conversion process in ever fast speed and you could find created AVI file in output folder on your computer.

VirtualDub alternative, even for a newbie, it will be easy to convert DVD to AVI. So, just give it a try.

Related Articles:

Video codecs explained

Leave a comment

From time to time, you get confused that PS4 supports AVI in the manual but you just couldn’t play AVI on PS4 via USB. And you originally thought that MP4 cound be played on any multimedia devices and media players but when you transferred MP4 to iPad, you couldn’t play the video. Why? What you saw is a video extension or video format while a video container can different video codecs.

 video codec

Normally, multimedia devices and media players not only have limitation on video format, they also have requirement on video codecs. That’s why you saw the video format in their file supported list but you couldn’t play the video. If you want to learn what is codec and what popular codecs are, just read on.

What Is a Codec?

A codec – or coder/decoder – is an encoding tool that processes video and stores it in a stream of bytes. Codecs use algorithms to effectively shrink the size of the audio or video file, and then decompress it when needed. There are dozens of different types of codecs, and each uses a different technology in order to encode and shrink your video file for the intended application.

Learn >> Multimedia Container Formats

Below are the common video codecs and standards you will see in daily life. This part is from divxland.org site where video codecs are explained detailedly.


Common video codecs and standards

  • H.261: Used primarily in older videoconferencing and videotelephony products. Developed by the ITU-T group, this was the first practical digital video compression standard. Essentially all subsequent standard video codec designs are based on it. It included such well-established concepts as YCbCr color representation, the 4:2:0 sampling format, 8-bit sample precision, 16×16 macroblocks, block-wise motion compensation, 8×8 block-wise discrete cosine transformation, zig-zag coefficient scanning, scalar quantization, run+value symbol mapping, and variable-length coding.

  • MPEG-1 Part 2: Used for Video CDs, and also sometimes for online video. The quality is roughly comparable to that of VHS. If the source video quality is good and the bitrate is high enough, VCD can look better than VHS, and all in all very good, but VCD requires high bitrates for this. However, to get a fully compliant VCD file, bitrates higher than 1150 kbit/s and resolutions higher than 352 x 288 should not be used. When it comes to compatibility, VCD has the highest compatibility of any digital video/audio system. Almost every computer in the world can play this codec, most DVD players support it.

  • MPEG-2 Part 2: Used on DVD, SVCD, and in most digital video broadcasting and satellite TV distribution systems. When used on a standard DVD, it offers good picture quality and supports widescreen. When used on SVCD, it is not as good as DVD but is certainly better than VCD. In terms of technical design, the most significant enhancement in MPEG-2 relative to MPEG-1 was the addition of support for interlaced video. MPEG-2 is now considered an aged codec, but has tremendous market acceptance and a very large installed base.

  • H.263: Used primarily for videoconferencing, videotelephony, and internet video. H.263 represented a significant step forward in standardized compression capability for progressive scan video. Especially at low bit rates, it could provide a substantial improvement in the bit rate needed to reach a given level of fidelity.

  • MPEG-4 Part 2: An MPEG standard that can be used for internet, broadcast, and on storage media. It offers improved quality relative to MPEG-2 and the first version of H.263. Its major technical features beyond prior codec standards consisted of object-oriented coding features and a variety of other such features not necessarily intended for improvement of ordinary video coding compression capability. It also included some enhancements of compression capability, both by embracing capabilities developed in H.263 and by adding new ones such as quarter-pel motion compensation. Like MPEG-2, it supports both progressive scan and interlaced video.

  • MPEG-4 Part 10: A technically aligned standard with the H.264, also referred to as AVC. This emerging new standard is the current state of the art of ITU-T and MPEG standardized compression technology, and is rapidly gaining adoption into a wide variety of applications. It contains a number of significant advances in compression capability, and it has recently been adopted into a number of company products, including the PlayStation Portable, iPod, the Nero Digital product suite, Mac OS X v10.4, as well as HD DVD/Blu-ray Disc.

  • DivXXvid, and 3ivx: Different implementations of the MPEG-4 Part 2 standard.

  • VP6: TrueMotion VP6, is a video codec developed by On2 Technologies as a successor to earlier efforts such as VP3 and VP5. The VP6 codec has been used in products for broadcasting in the field, such as with BBC reporters and QuickLink software. Currently, On2 VP6 is the video compression technology that Macromedia/Adobe licensed for its Flash 8 family of products. 

  • Sorenson 3: A codec that is popularly used by Apple’s QuickTime, basically the ancestor of H.264. Many of the QuickTime movie trailers found on the web use this codec.

  • Theora: Developed by the Xiph.org Foundation as part of their Ogg project, based upon On2 Technologies’ VP3 codec, and christened by On2 as the successor in VP3’s lineage, Theora is targeted at competing with MPEG-4 video and similar lower-bitrate video compression schemes, but without significant success.

  • WMV (Windows Media Video): Microsoft’s family of video codec designs including WMV 7, WMV 8, and WMV 9. It can do anything from low resolution video for dial up internet users to HDTV. It is widely used on Media Centre PCs. WMV can be viewed as a version of the MPEG-4 codec design.

  • RealVideo: Developed by RealNetworks and aimed for streaming media over Internet. A popular codec technology a few years ago, now fading in importance and popularity for a variety of reasons.

  • Cinepak: A very early codec used by Apple’s QuickTime.

All of the codecs above have their qualities and drawbacks. The tradeoff between bit rate and fidelity (including artifacts) is usually considered the most important figure of technical merit.


How to Change Video Codec?

Pavtube Video Converter Ultimate is a video transcoder that can transcode your video codec without changing your video format. It also can remux video to another format keeping original video codec and audio settings. It can accept nearly all video format/container including MKV, MP4, AVI, WMV, FLV, ACVHD, MXF, even Blu-ray and DVD and Pavtube Video Converter Ultimate can offer you hundreds of video formats and containers.

When you need to change video codec, you should launch the software and add your video files by click "Files" button at the top left corner. Then you can choose wanted output format. To change video codec, you should click "Settings" button on the interface to open a new windows like below. In Video Codec, you can choose your desired codec.

What’s more, Pavtube Video Converter is also a video editor. It enables you to compress 4K to 1080p full resolution video for smoothly playback on portable devices or other file formats with small file size but with high quality. On top of that, it provides many basic but distinctive video editing functions such as video trimming, cropping, splitting, merging, parameters adjusting, watermarking, subtitle inserting, color effecting to help enhance your video to a high level.

Free download and install 
  

Related Articles:

How to Make Region-locked DVD Region free?

Leave a comment

Most commercial DVDs use encryption that keeps them locked to one or more “region codes,” meaning the discs you pick up in other continents usually won’t play on an American DVD player. If you believe the movie studios, this encryption is a necessary tool in the ongoing war against piracy. But DVD Region Codes limit us the playback, which leads some discussion on the Internet about codes for “unlocking” DVD players so that they can play DVDs having other region codes freely》

DVD Region Codes and Where They Are Used

DVD Region Code Geographic Region(s) Used
0 Region code “0” is an informal way of saying that all region codes are set, which is equivalent to the absence of a region code. There is not really a region code “0”.
1 USA and Canada (not Mexico or Greenland)
2 Western Europe, the Middle East, South Africa, and Japan
3 Southeast Asia
4 Central and South America and Oceania
5 Africa, India, and countries of the Former Soviet Union
6 Mainland China

If you cannot “unlock” your existing DVD player, the most obvious and straightforward way to overcome DVD region codes is to purchase a DVD player from the same part of the world as the DVDs that you want to watch. However, this presents certain challenges. So how to unlock DVD region codes to play DVD freely? A DVD ripper to bypass DVD region code is necessary. Pavtube BDMagic is excellent to help you unlock DVD region code for playback anywhere.

This software can disable DVD region code including all region code protected DVDs and decrypt any encryption technology such as CSS, Disney X-project DRM. Once you got this ripper, more benefits are guaranteed. You are entitled to backup DVD with superfast speed, to obtain free technical support, to enjoy lifetime free upgrades and retrieve registration code, etc.

What’s more, Pavtube BDMagic also can convert DVD to digital files such as MKV, MP4, M3U8, H.265, WMV, etc for you playing DVD on QuickTime, WMP, KMPlayer, etc desktop media player without worry about DVD region codes.

Free Download this Top DVD Copier and Ripper:


How to Unlock DVD Region Code to Play DVD Freely?

Step 1. Load the DVD disc.

Insert your DVD disc into your drive, run Pavtube BDMagic and click “BD/DVD disc” icon to load movie from DVD source(Disc, folder, ISO).

rip blu-ray to mp4

Note: Set your wanted subtitles and audio track from the drop-down box of “Subtitles” and “Audio” tab.

Step 2. Specify the output format as MP4.

Choose suitable format by clicking “Format” drop-down menu. There are optimized format for iPhone 7, Galaxy Note 7, Galaxy Tab S, iPad Air 3, Surface Pro 4 and more. Basically the “Common Video -> H.264 Video (*.mp4)” is a universal format for Android/iOS/Windows tablets and smartphones.

rip blu-ray to mp4 with pavtube

Step 3. Start converting DVD to MP4 without region codes

When all the settings are done, click the “Convert” button to begin converting DVD to MP4 format. When the conversion ends, you can enjoy the DVD movies on your MP4 compatible devices without any hassles.

Tip: If you think the video size this not suitable for your portable Tablet or Phone, you can first choose any one of the provided type, then change the settings. Please remember the file size is based more on bitrate than resolution which means bitrate higher results in big file size, and lower visible quality loss.

More features in BDMagic:

1. Full Disc Copy can 1:1 backup the whole Blu-ray/DVD disc with original structure including chapter markers.

2. Directly Copy will backup 100% intact Blu-ray/DVD main movie with all the multiple tracks excluding menu.

3. You can edit the video before conversion including trim, crop, effect, etc, add *srt and *ass subtitle into video part and so on.

Related Articles: