Store Blu-ray/DVD Movies/TV shows to MyBookLive NAS for Share

Leave a comment

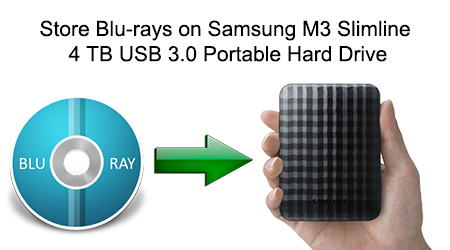
The Western Digital My Book Live NAS server is easy to use, fast, and affordable. Simplify your digital life by consolidating your movies, music, photos, and files in one location for everyone on your wired or wireless network to share with a Western Digital My Book Live Network-Attached Storage drive. If you’ve lots of downloaded movies (MKV, AVI, WMV, MKV, M2TS etc) or Blu-ray, DVD and want to transfer them to MyBook Live for streaming with ease, here is a simple tutorial for you. In this article, we will show you the easiest way to transcode any Videos to WD MyBook Live NAS supported video formats with best quality.

Here is a customer review from Pavtube:

“I need a kind of tool which can help me converting my Blu-ray and DVDs movies and TV shows, and the ripped movies/TV shows are stored on my MyBookLive network attached storage. So, I googling “video converter” and find the Pavtube Video Converter Ultimate! The output format i just choose as “.mp4” as it plays on all of my devices and computers. ”

Maybe, you have met the same problems, from the MyBookLive NAS offical website we know that MyBookLive NAS cannot directly play the Blu-ray/DVD Movies/TV shows, so the best solution is that: find a top Video Converter Ultimate for MyBookLive NAS storage.

This Top Video Converter for MyBookLive NAS With Highest praise: “I can’t really think of a feature or improvement…Pavtube Video Converter Ultimate does everything I need.”

Here, Pavtube Video Converter Ultimate is an easy-to-use yet professional program for MyBookLive NAS Owners. It takes everything from the Blu-ray/DVD/TV Shows. With it, you can convert the 2016 Oscars winners Blu-ray/DVD movies/downloaded HD Videos to almost all regular video formats like MKV, MP4, MOV, FLV WMV, AVI, etc. for storage on WD My Book Live and playback on TV in fast ripping speed and high output quality. In addition, the built-in video editor lets you personalize your Blu-ray/DVD/Video by trimming, cropping, rotating, adding watermarks, adjusting video effects, and adding external subtiles (*.srt and *.ass, *.ssa) to your movie videos. Here is review.

Good News! To thanks for your continuous support, Pavtube Official Website and Pavtube Facebook are now holding the biggest sale for this 88th Academy Awards with fantastic 50% off discounts and giveaway. Pay less to get powerful Blu-ray/DVD/Video Converter to build your own home media center on this Week of Feb.22~Feb.29 2016!

Free Download This Top Video Converter for MyBookLive NAS Owner:


Other Download:
– Pavtube old official address: http://www.pavtube.cn/blu-ray-video-converter-ultimate/
– Cnet Download: http://download.cnet.com/Pavtube-Video-Converter-Ultimate/3000-2194_4-75938564.html

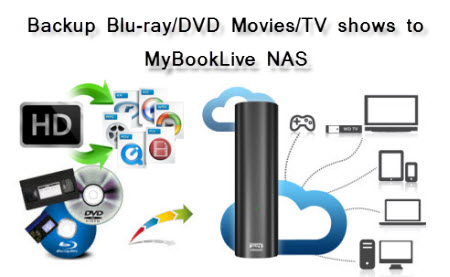
Backup Blu-ray/DVD Movies/TV shows to MyBookLive NAS for Devices

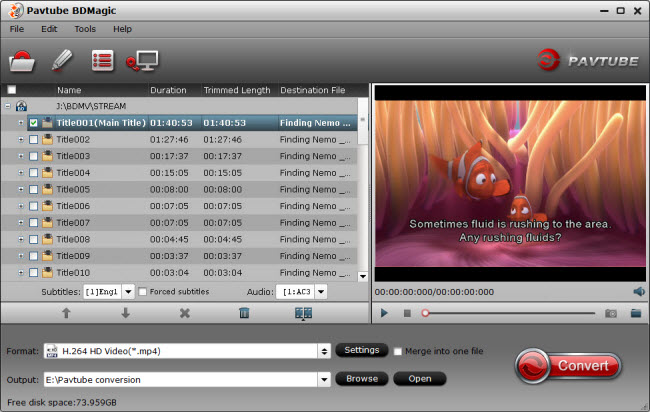
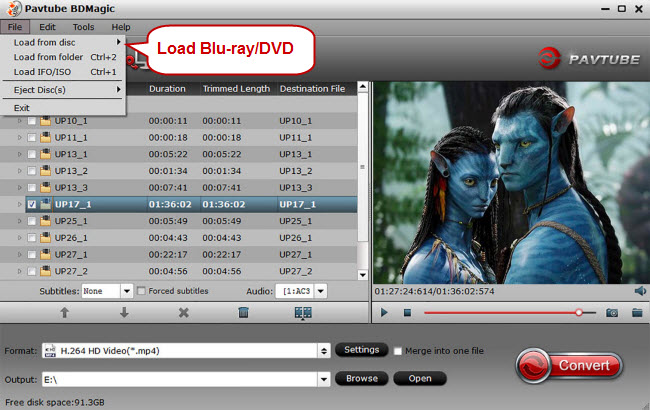
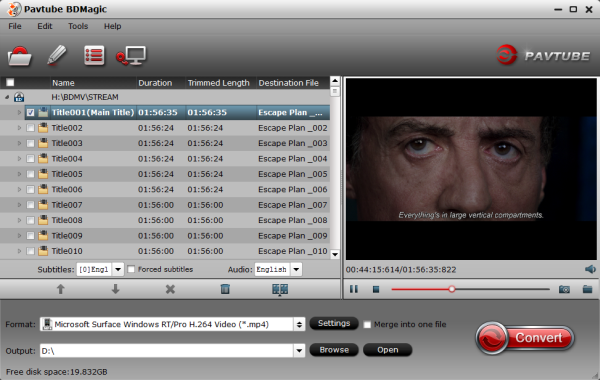
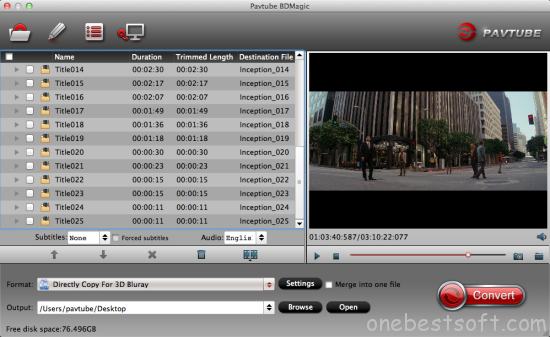
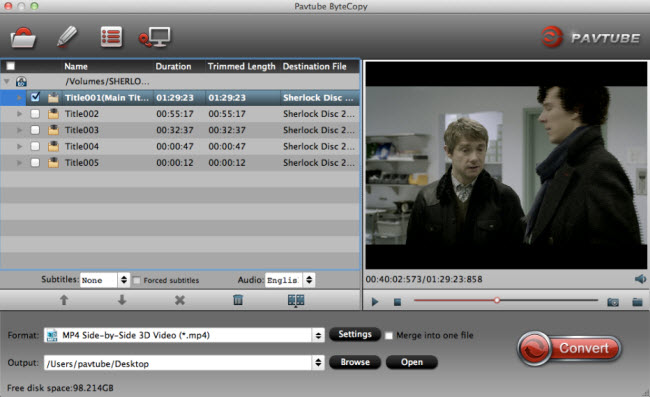
Step 1: Add Blu-ray/DVD Movies/TV shows

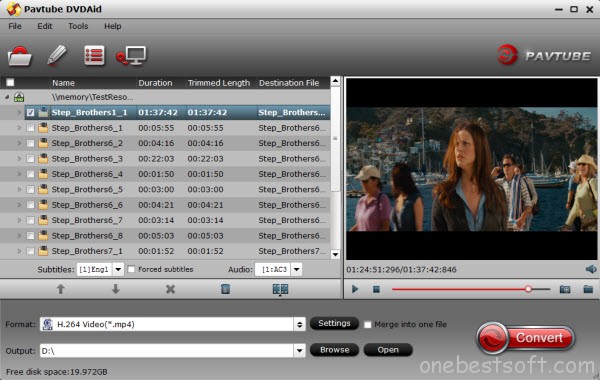
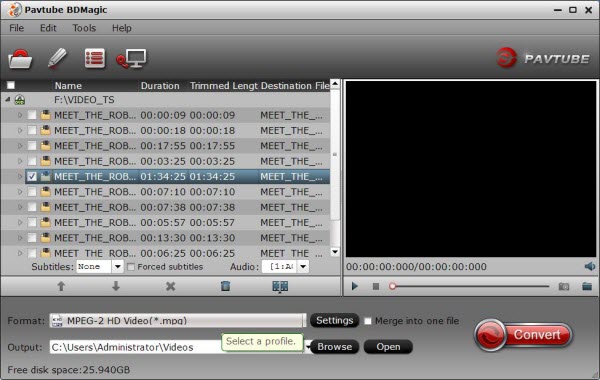
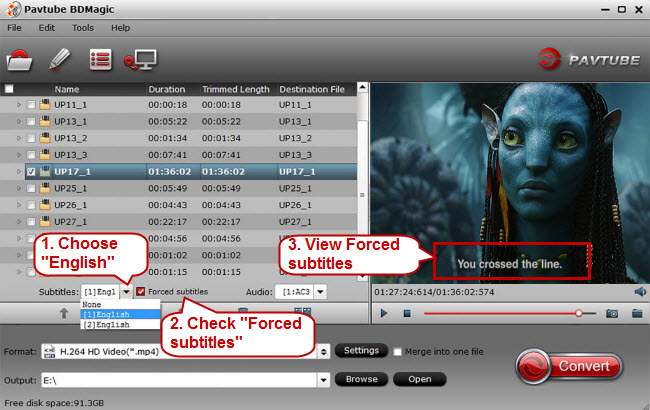
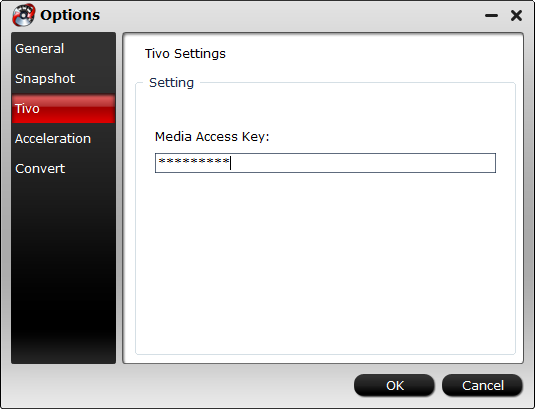
Launch the program, click the “Add Video” icon to add MKV, AVI, VOB, MPG, Tivo, FLV videos which you want to convert by clicking the “Add file” button. You can select your desired subtitle from “Subtitle” box below the chapter list.

Tip: If the file you want to convert is Tivo recording, the program will ask you to enter your Media Access Key. Do as the program requires, and then click “OK” to continue.

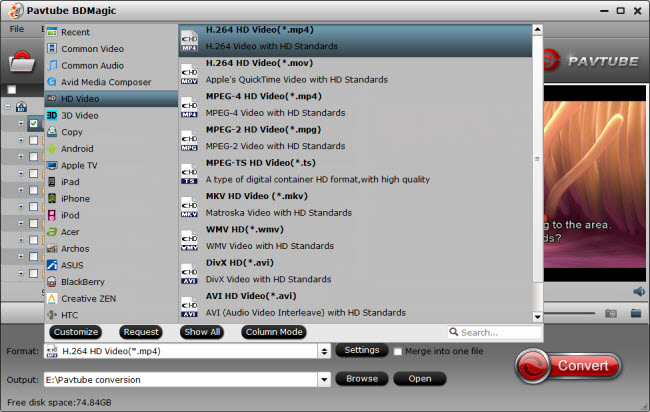
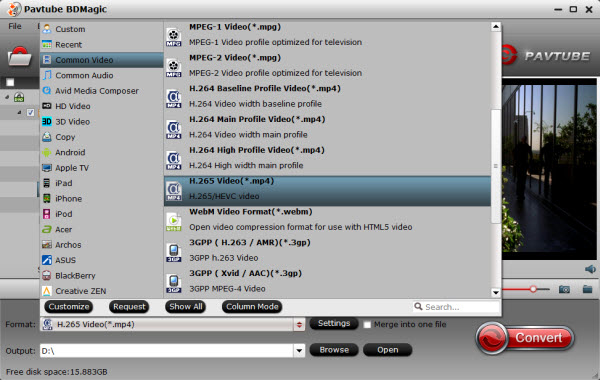
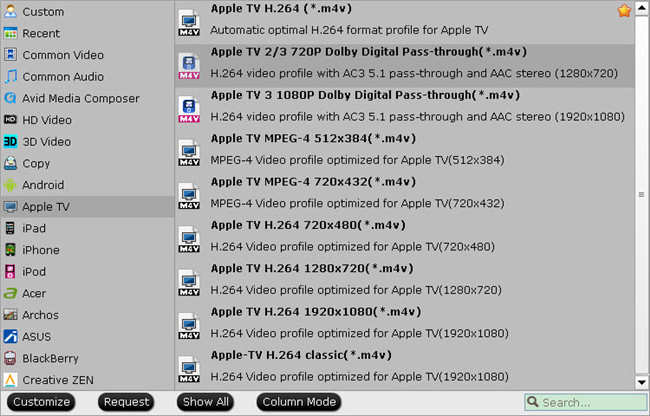
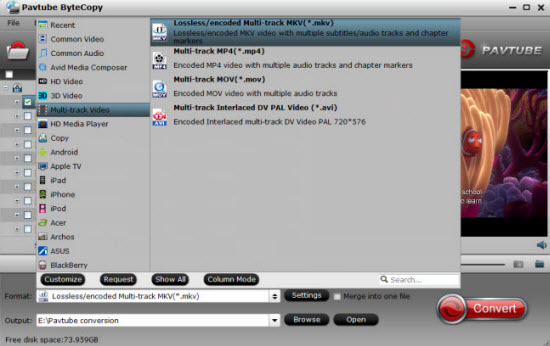
Step 2. Select the output format

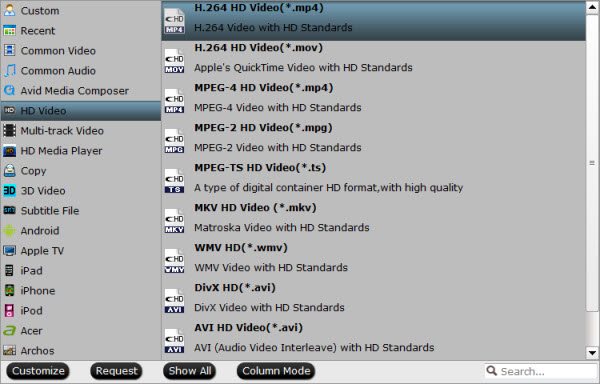
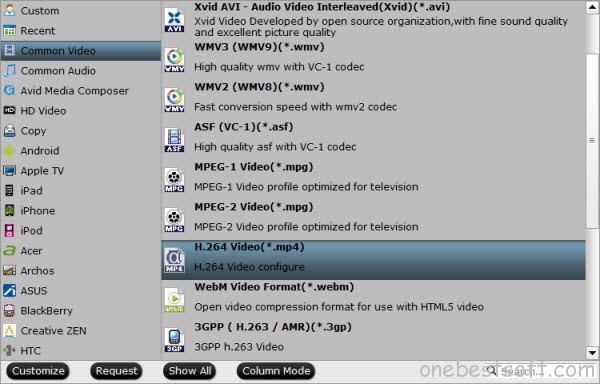
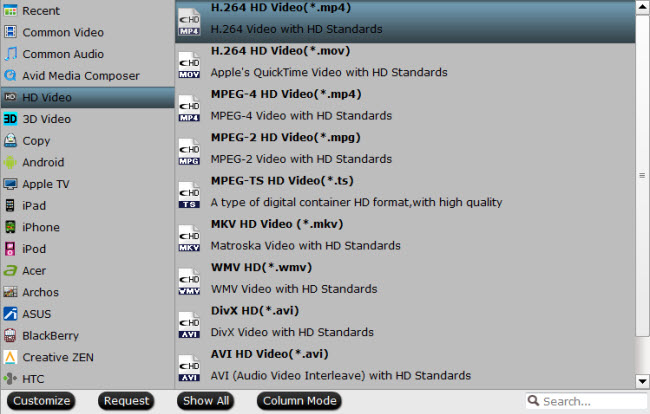
Click “Profile” and select MP4 from Common Video category as the output format. To get better quality, you can choose MP4-HD from HD Video category.

Note: MP4 is supported by nearly all multimedia devices and media players, including iPhone 7, Samsung Galaxy S7, PS4, Quicktime, WMP, etc so that you can broadcast your Movies via MyBookLive NAS on various devices.

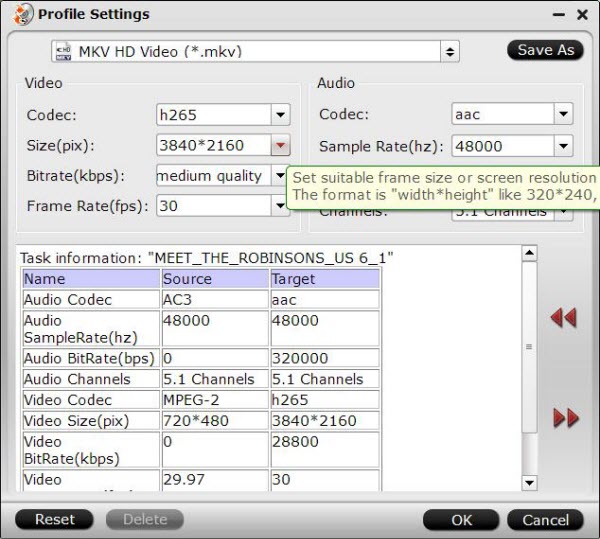
Tip: If you think the video size this not suitable for your Android Tablet or Phone, you can first choose any one of the provided type, then change the settings. Please remember the file size is based more on bitrate than resolution which means bitrate higher results in bigger file size, and lower visible quality loss.

Step 3. Stream Movies onto WD My Book Live.

When all the settings are OK, click “Convert” button to start converting Blu-ray/DVD/HD movies to MP4 videos for WD MyBook Live NAS. After the copying process completes, you can get the final output files by clicking “Open” button with ease, then copy resulting file to My Book Live and then stream onto your Media Players/Devices.

Note:Whether you can use MyBookLive NAS have a connected TV, smartphone, tablet, laptop, WD TV Live media player, Blu-ray Disc player, Xbox 360, PlayStation 4, or Roku 4, enjoy your content wherever you go.

Read More:

Store Blu-rays on Samsung P3/M3 Slimline 4 TB Portable Hard Drive

Leave a comment

With the coming of big data era, demands for large-capacity hard disks are increasing obviously, and we can find a lot of such disks from the internet. Recently, Samsung HDD announces the thinnest and lightest weight 4TB external hard drives in the world, including the Samsung M3 4TB Portable drive and the Samsung P3 4TB Portable drive. Both of them are the first 4TB external hard drives residing in 2.5 inch shells, and they are only a 1/10 of an inch thicker than the Samsung 2TB potable drive though they are in 4TB capacity.

If you have run out of space to store all your Blu-rays, copying Blu-ray to Samsung P3/M3 4TB Portable drive is an optimal choice. Below is the step-by-step guide how to put Blu-ray to Samsung P3/M3 4TB Portable drive for sharing widely.

Hot Search: Blu-ray to PS3DVD to Seagate Wireless PlusDVD to QNAP TS-469L NASDVD to Synology DS414 | Blu-ray to iStick

Can we copy Blu-ray to Samsung Portable drive directly? The answer is no. Almost all Blu-ray movies are encrypted with copy protection. You’ll usually get an error if you try to copy the contents of an encrypted Blu-ray to Samsung P3/M3 4TB Portable drive. Using Blu-ray ripping software to rip Blu-ray to Samsung P3/M3 is the best way to resolve the issue.

Here i strongly recommend you try the Pavtube BDMagic (Windows 10 compatible) per my experience. With it, you can effortlessly rip all of your Blu-rays to a proper format appropriate for uploading to Samsung P3/M3 4TB Portable drive and then you can play your perferred Blu-ray/DVD movies on many devices like iPads, tablets, laptops, and smartphones. What’s more, the audio/video synchronization is very good, the size of the subtitles too. <review>.

If you are a Mac user, please turn to the equivalent Mac version – Pavtube BDMagic for Mac, which can help you convert and copy Blu-ray to Samsung P3/M3 4TB Portable drive on Mac OS X (including El Capitan). Then download the right version according to your system and follow me to rip Blu-ray to Samsung P3/M3 4TB Portable drive.

Free Download and trail:


Other Download:

– Pavtube old official address: http://www.pavtube.cn/blu-ray-ripper/
– Cnet Download: http://download.cnet.com/Pavtube-BDMagic/3000-7970_4-75922877.html

Hot News: Pavtube Software officially released its 2015 Christmas Day Deal. Pavtube BDMagic for Windows/Mac is available with 30% off is provided on christmas week, Don’t miss it!

How to Rip and Copy Blu-ray to Samsung P3/M3 4TB Portable drive friendly video

Step 1. Load Blu-ray movies

Click the “Load Blu-ray” button on the top left to add the Blu-ray movie file to the ripper. After the BD files are loaded, you can preview them on the right viewing window and take snapshots of your favorite movie scene. DVD, ISO and IFO files are also supported.

Step 2. Choose output format

Since almost of all the media devices like iPad, laptops, smart TV, game consoles, Apple TV, smartphones and tablets that Samsung P3/M3 4TB Portable drive can be used with can support MP4 video files. So you can target MP4 as output format from “Common Video”.

Tip: Simply click Settings bar and you can tweak the settings like video bitrate, frame rate, audio sample rate, etc to your satisfaction and even save it as preset.

Step 3. Start Blu-ray movie conversion

Hit the “Convert” button to start ripping Blu-ray movies to MP4 format for free access by Samsung P3/M3 4TB Portable drive supported multimedia devices.

After the conversion, click Open button to locate the output videos. Afterwards, you can copy and upload the converted Blu-ray to your Samsung P3/M3 for easier access on iPads, Wi-Fi enabled smartphones and tablets, iPads, laptops, etc. Enjoy.

Read More:

Rip Blu-ray Movie to iStick for Playback on Any HDMI Devices

Leave a comment

Are you trying to load the movie file on to the stick so that you can then plug the stick into the iPad to play the movie instead of taking up space on the iPad? Actually, iStick is an USB flash drive designed exclusively for Apple devices, and this is a only through apple MFi (Made for iPhone, iPod, iPod) certification of external storage products. Another downside is that the iPhone support for video format is not enough, the native support only a few format such MOV, MP4, 3GP, if want to see more public MKV and RMVB format video, will have to download a third-party player.

As we all know, you cannot directly place Blu-ray disks on iStick because it is not equipped with Blu-ray Disc Drive for disc reading. In order to play Blu-ray movies through USB-Stick, you should you need to convert Blu-ray to iStick compatible MP4 or MKV format first, and then stream Blu-ray movies to TV via iStick for watching movies.

Here Pavtube ByteCopy comes as the bee’s knees(Read review), which can help you fast rip Blu-ray and DVD discs to a format playble by iStick for streaming to TV or iPad while keeping the original quality and the ripping process is simple as ABCD. After downloding, follow the wizard to install and run the program. The mac version is here. Then follow the steps below to convert Blu-ray to iStick/TV or other devices comaptible formats in a few clicks!

Free Download and trail:


Other Download:

– Pavtube old official address: http://www.pavtube.cn/bytecopy/
– Cnet Download: http://download.cnet.com/Pavtube-ByteCopy/3000-7970_4-76158512.html

Hot News: Pavtube today announces an official start of ByteCopy for Windows/Mac in the Round 1 phase of its Christmas promotion for All Facebook Fans50% Discount Coupon! Only 3 Day! Time-Limited! Rush to Buy! Reportedly 5 to 6 times faster as well as multi-track MKV/MP4/MOV output than a boatload of its competitors, this Windows-based program is eating up a bigger market share.

How to Rip and stream Blu-ray movies to iStick for Devices Watching

Step 1: Insert your Blu-ray disc into Blu-ray drive, Launch the program and click the “Disc” button to import the Blu-ray movies. Blu-ray folder and ISO files are also supported. You can select subtitles as you want.

Step 2: Click Format and choose MP4 video from Common Video, which can be recognized by iStick well. MKV is also a good choice; as a container format it takes whatever you give it. Or choose HD MP4/HD MKV from “HD Video”. And then click the Browse button to specify an output folder to save the converted files.

* Also read how to backup your Blu-ray via WD TV Live Plus and Dune HD Media Player.

Tip: With the right settings you can retain the quality of the original Blu-ray while also saving space. This is particularly helpful when streaming over your network, depending on your network quality. Simply click Settings bar and you can tweak the settings to your satisfaction and even save it as preset.

Step 3: Finally, hit the “Convert” button at the bottom of the main interface to start the conversion. It will automatically convert Blu-ray to iStick compatible video files.

Once the conversion is finished, click “Open” to quickly find the converted movies. Now start streaming the ripped Blu-ray to iStick for TV player. Now enjoy all your Blu-ray collections on TV in home cinema use iStick!

Pavtube ByteCopy Pros:

1. All-in-one. Do crack and convert DVD and Blu-ray.
2. Lossless. Keep multiple original video, audio, subtitle streams without changing.
3. Fast. Single layer DVD copied to MKV in 10 mins, BD around an hour under lossless mode; 1.5 -5 hours under compressive mode. GPU acceleration(CUDA) ready.
4. Easy operation. 2 steps process for lossless BD/DVD to MKV ripping.
5. Flexible. You decide which streams to keep, what codec to use, and what quality to export.

Learn more:

Save DVD on Google Drive For Playing on Christmas Party !

Leave a comment

“Can I upload a bunch of old DVD’s onto Google Drive or Google’s new Photo? I have a bunch of old movie DVD’s I’d love to get rid of but still have access to on the cloud.” – Question from Quora.

Google Drive is Google’s new cloud storage services, like Dropbox, Apple iCloud, SkyDrive. It allows users to store files in the cloud, share files, and edit documents, spreadsheets, and presentations with collaborators. It support 30 types of files, such as document, pictures, HD video, Adobe Illustrator and Photoshop, but problem comes, right? Why can’t we stored directly DVD movies on Google Drive?

At first, Google Drive gives you control over all of your file types in a single place, including video files. Here, we listed the useful features of Google Drive as below:

  • Documents are free. Google gives you 5GB of free storage space.
  • Upload up to 30 types of files.
  • Share files, pictures, videos.
  • Utilize Google Goggles
  • Collaborate on videos, photos, and more.
  • Install third-party apps

Almost all movies are encrypted with CSS copy protection. Decryption keys are stored in the normally inaccessible lead-in area of the disc. You’ll usually get an error if you try to copy the contents of an encrypted DVD to Google Drive. However, if you have used a software player to play the movie it will have authenticated the disc in the drive, allowing you to copy without error, but the encryption keys will not be copied. If you try to play the copied VOB files, the decoder will request the keys from the DVD-ROM drive and will fail. You may get the message “Cannot play copy-protected files”.

Now that it doesn’t work to directly copy DVDs to Google Drive, using DVD ripping software is the best way to rip DVDs to Google Drive supports MP4, AVI, MOV, FLV, WMV etc. video files. Here Pavtub DVDAid is recommended to you. This DVD ripping tool can rip any encrypted DVD and convert DVD to Google Drive readable MP4, MOV etc. formats as well as other popular formats, like rip DVD to AVI, MKV, M3U8, H.265, WMV, MPG, FLV, SWF, M4V, etc. on Windows (including Windows 10, 8.1 and 8). For the video size limit of Google Drive, etc site, the built-in editor also allows you to extract DVD clips with the very part you want. Or, you can just choose to rip certain chapters of a DVD as you like.

Note: If you are a Mac user, please turn to DVDAid for Mac, support Mac OS X El Capitan, Yosemite 10.10, 10.9 Mavericks, 10.8 Mountain Lion, 10.7 Lion, Snow Leopard10.6, Leopard 10.5. Now download the right version of the program and follow the guide below.

Other Download

– Pavtube old official address: http://www.pavtube.cn/dvd_ripper/
– Cnet Download: http://download.cnet.com/Pavtube-DVDAid/3000-7970_4-76158510.html

Rip DVD to Google Drive in readable video format for uploading?

Step 1. Load DVD movies

Insert the DVD disc into your computer’s DVD drive and run DVD Ripper. You can click the “Load DVD” button to load the DVD files to the program. DVD ISO/IFO, VIDEO_TS folder are supported also.

Step 2. Specify output format

As has been stated above, Google Drive supports MP4, etc video files. So you can just select “Common Video” > “H.264 Video(*.mp4)” as the output video format. Also you can transfer your DVD to Media Hub,Cloud Storage and External Hard Drive/Thumb DriveFlash drivePlex for storage and playback.

Step 3. Trim/Edit DVD files

A. Since Google Drive has limitations about the uploading video size(If you only have the free account, you only have 2 GB of space), please pay attention to the video size when ripping DVD movies for Google Drive. Here we should highlight the trim function on this software.

B. Just click “Edit” to trim the DVD videos to get the very part you want. Besides trimming, cropping, adding watermark, adjusting special effect, are well supported as well.

Step 4. Start converting DVD to Google Drive

When all these settings are ready, you can click the “Convert” button to begin the DVD to Google Drive conversion. When the ripping is done, you can click on “Open” button to locate the ripped videos.

Tips: You can learn other tips about >> how to Compress your video files to save space on Google Drive.

Editor’s Note: Tips and notes:

Sync or upload your video in the original format and in the highest quality possible. The maximum resolution for playback is 1920×1080. Audio and video lengths should be the same, audio and video should start and end at the same time.

How to Preview and play a video in Google Drive:

All of your uploaded videos can be found when you search Google Drive for Videos using the drop-down arrow in the search box. Click a file name to open and play the video using the Google Drive video player.

Now, you can easily rip DVD movies and want to add to Google Drive for streaming and playback on iPhone, iPad, Android, Surface Pro 4, BlackBerry, Plex, PS4, WDTV, smart TV and more media devices, The program is very easy to use and the output video quality is excellent. You should give a try!

Read More:

Rip Blu-ray to H.265 MP4 for Roku 4 with High Def TV playback

Leave a comment

Q: “I got the new Roku 4 and found that my Blu-ray collection cannot playback on Roku 4 with high Def TV directly. So,I need a tool which can help me copy my blu-rays to H. 265 because of the smaller size and less bandwidth to stream while watching the movie. On my Roku 4 with high Def TV. And I also have a networked attached storage device that has all my videos on it. Which tool can help me rip “blu-ray to H.265 MP4”for Roku 4 and 4KTV?” – 》》Apple TV 4 vs Roku 4.

In near future, HEVC will be used by almost every content. It is a matter of decision for service whether to send data using HEVC/H.265 instead of MPEG-4/H.264. Many companies have already begun to use HEVC for streaming 4K content. Like the hottest Roku 4 promises the best-quality 4K video streams and makes 4K TV shows and movies easy to find with more 4K-capable apps than other devices. If you have got a box of Blu-ray discs and want to rip them for storage and playback with more efficient coding, converting Blu-ray to H.265 MP4 is a wise choice.

To help users to encode Blu-ray movie to H.265 easily, Pavtube BDMagic is just updated with the H.265 decoder/encoder and TV Profiles, which is rated as the best all-in-one Blu-ray to H.265 MP4 converter. Read the review.

You can get H.265/HEVC encoded HD MP4 from Blu-ray not only for space-saving storage but also for playing on H.265 compatible multimedia players like VLC, Divx, PotPlayer, Hoid P HEVC H265 Video Player, PowerDVD 14 Ultra, etc with rich media experience. esides, it allows you to compress 4K to 1080p for your normal HD TV so that you can play Blu-ray on any Smart TV via Roku 4. For Mac users, you can turn to Pavtube BDMagic for Mac. B

Step-by-Step guide: Encode Blu-ray to H.265/HEVC MP4 for Roku 4 via 4KTV with ease

Free Download Top Blu-ray to H.265 MP4 Ripper for Roku 4:


Other Download:

– Pavtube old official address: http://www.pavtube.cn/blu-ray-ripper/
– Cnet Download: http://download.cnet.com/Pavtube-BDMagic/3000-7970_4-75922877.html

Step 1. Load Blu-ray movies

Install and launch the best Blu-ray to H.265 MP4 Converter program. Insert your Blu-ray disc into your BD drive, and click “Load file(s)” icon to load your Blu-ray movies. You can also import movies files from Blu-ray folder, ISO and DVD discs.

Step 2. Select H.265 as output format

Hit the “Format” box and select H.265 Video(*.mp4) from Common Video profile. It enables you to rip Blu-ray/DVD to H.265 .mp4 for Roku 4/4KTV with the best quality.

Tip: If you wanna some advanced settings, you can click “Settings” icon to adjust the video, audio parameters bitare, frame rate, sample rate, audio channel, etc. Plus, you can click “Edit” button to do some editing work cropping, trimming, settings effect, adding subtitles.

Step 3: Change output file resolution.

If you want to play converted Blu-ray movies on 4K TV via Roku 4, you can upscale the output file resolution to 3840*2160 from “Size(pix)” in the “Profile Settings” window.

Step 4: Convert Blu-ray to H.265 encoded HD MP4 format.

Hit the “Convert” icon on the right-bottom to start the conversion process. Get ripped Blu-ray files by clicking the “Open output folder” button.

Then you will be able to save all your precious Blu-ray movies with H.265 MP4 files for Roku 4 and 4KTV Playback in rich media experience.

NEWS!!! Recently, Pavtube Studio has upgraded its top-ranked Pavtube BDMagic to version 4.9.0.0 with supporting the most advanced hardware acceleration NVIDIA CUDA & AMD APP by H.264/H.265 codec, which can give users 30x video transcoding speed than before.

Read More:

Best Approach – Rip DVD with Forced Subtitles

Leave a comment

Forced subtitles are shown regardless of current player setting, typically when movie contains a foreign language scene. Many ripper users send feedbacks to us about the forced subtitle setting issue, here we will impart you the information on DVD/movie subtitles and answers for those who wanna rip DVD movies but like to include forced subtitles, just read on to find some clues.

When ripping a DVD movie, it’s wise to rip DVD with forced subtitles contained for a better visual experience. But, how to back up a DVD with the scene and only foreign language subtitles during the scene? Before solved the problem, I would give some information about Several Kinds of DVD/Movie Subtitles.

DVD/Movie Subtitles are textual versions of the dialog or scene in DVD film videos displayed at the bottom of the screen, to have viewers understand the spoken dialogue or the signs better.

Soft Subtitle is involved in the actually DVD video, but is independent of the movie video. When ripping a DVD, it’s usually titled “Track *”.

Hard Subtitle, contrary to soft subtitles, attaches itself into the actual video and would always come along with the video.

Forced Subtitle appears on screen when a foreign/alien language is spoken, or showed in a sign, location, or other text, aiming to explain the meaning but can not be placed in the dubbing. When ripping a DVD, it’s directly titled “Forced Subtitle”.

Note: Generally, only the foreign dialogues and signs that matter the movie plot are translated in the forced subtitle.

The Answer About DVD forced subtitle issues as you need: You may have started converting your DVDs to common video files, but you probably would be a bit confused as how to get forced only subtitles in DVD movies. Well, forced subtitles option in Pavtube BDMagic is a great choice to preserve only subtitles and lines in foreign language.

It allows users to backup DVD movies to various formats with forced subtitles to meet the different playback needs on iPhone 6S, iPad Pro, Samsung Galaxy S6, Android smart phones. Besides, it also can add SRT/ASS/SSA subtitles to movies.

If you are a Mac user, it sweetly designs BDMagic for Mac version. It has been upgraded support the New Mac OS X El Capitan.

Free download and install BDMagic on Windows:


Other Download:

– Pavtube old official address: http://www.pavtube.cn/blu-ray-ripper/
– Cnet Download: http://download.cnet.com/Pavtube-BDMagic/3000-7970_4-75922877.html

How to rip DVD with forced subtitles?(Subtitle When Foreign Languages Are Spoken)

Step 1. Load DVD movieRun this DVD ripping tool on PC and click “File” to follow “Load from disc” to import the DVD movie you want to rip with forced subtitles.

Step 2. Choose “Forced subtitles”

Click “Subtitles” dropdown list and choose “English.” And then check the box “Forced subtitles” nearby to realize DVD movie enjoyment with English subtitles only when there is an alien language spoken.

Step 3: Choose output format

In profile list, it offers 200+ video formats for consumers. You can choose MP4, MKV, MOV, FLV, M4V, AVI, etc to be compatible with your multimedia player, like ChromebookSamsung Galaxy Note 4Sony Bravia TV, etc.

Step 4: Start to rip DVD with Forced subtitle

After check the “Forced subtitles” option, click “Convert” to start backup DVD movies, and after conversion, you can get and enjoy the ripped DVD movies with subtitle displayed only when a particular language is spoken with better visual experience.

Tips: Several Kinds of DVD/Movie Subtitles:

DVD/Movie Subtitles are textual versions of the dialog or scene in DVD film videos displayed at the bottom of the screen, to have viewers understand the spoken dialogue or the signs better.

Soft Subtitle is involved in the actually DVD video, but is independent of the movie video. When ripping a DVD, it’s usually titled “Track”.

Hard Subtitle, contrary to soft subtitles, attaches itself into the actual video and would always come along with the video.

Forced Subtitle appears on screen when a foreign/alien language is spoken, or showed in a sign, location, or other text, aiming to explain the meaning but can not be placed in the dubbing. When ripping a DVD, it’s directly titled “Forced Subtitle”.

Note: Generally, only the foreign dialogues and signs that matter the movie plot are translated in the forced subtitle.

With the forced subtitles in DVD movies, you never need to worry about the foreign and alien language any more. And when it is just English dialogue, you can enjoy full screen watching without subtitles displaying.

Related Articles:

Backup Blu-ray/DVD to Full MS 2008 Server for Home Theater

Leave a comment

Windows Server 2008 R2 is a server operating system produced by Microsoft. It was released to manufacturing (RTM) on July 22, 2009 and launched on October 22, 2009. It is the first 64-bit-only operating system released from Microsoft. Version enhancements include new functionality for Active Directory, new virtualization and management features, version 7.5 of Microsoft IIS Web Server and support for up to 256 logical processors. – From Wikipedia.

If you want to copy dozens of Blu-ray/DVD movies to Full MS 2008 Server for HD media player/home theater playback, you may have to convert and rip Blu-ray/DVD to HD media player/home theater compatible MP4 format first.

To be sure, most of you know how to rip Blu-rays, and have been doing so just fine. The problem you face is how to rip Blu-ray to a Full MS 2008 Server proper format with best settings for Asustor AS-204T streaming while maintaining the highest quality possible. As far as we know, MP4, MKV are commonly supported formats for computer, Apple TV, iPad Air, iPhone 6S, iOS devices, Roku player, etc via streaming videos from Full MS 2008 Server. Thus, what you need is a professional Blu-ray/DVD ripping tool that supports converting Blu-ray/DVD to MP4/MKV for Full MS 2008 Server streaming with the best quality.

Take a try with Pavtube BDMagic. (review). This software is designed to backup Blu-ray/DVD to MP4 or any other formats (AVI, WMV, FLV, MOV, etc) with all information including subtitles, chapters, audio tracks and movie languages included. What’s more, it can also enable you to rip Blu-ray/DVD for directly playback on Android, iOS, Windows based devices. If you are using Mac, you can also use the Pavtube BDMagic for Mac for copy Blu-ray/DVD to Full MS 2008 Server via Mac OS X El Capitan.

Learn >> how to compress 1080p Blu-ray to compatible size for Full MS 2008 Server/Portable Devices.

Free Download the Blu-ray/DVD to Full MS 2008 Server Converter:


Other Download:

– Pavtube old official address: http://www.pavtube.cn/blu-ray-ripper/
– Cnet Download: http://download.cnet.com/Pavtube-BDMagic/3000-7970_4-75922877.html

Step 1: Insert your Blu-ray/DVD disc into your BD drive, run the best Blu-ray/DVD to Full MS 2008 Server Converter and click “BD/DVD disc” icon to load movie from Blu-ray/DVD source (Disc, folder, ISO).

Step 2: Click the “Format” option, and choose HD Video > H.264 HD Video(*.mp4) as output format. You can also choose MKV HD Video(*.mkv) for your Full MS 2008 Server and Media Players.

Tip: If you like, you can click “Settings” to change the video encoder, resolution, frame rate, etc. as you wish. Keep in mind the file size and video quality is based more on bitrate than resolution which means bitrate higher results in big file size, and lower visible quality loss, and vice versa.

Step 3: Click the convert button under the preview window, and the Blu-ray/DVD ripper will start the conversion from Blu-ray DVD movies to MP4 for Full MS 2008 Server.

After conversion, you can stream Blu-ray/DVD movies through Full MS 2008 Server for Home Theater playback. Just have a try!

Read More:

Copy DVD to Synology DS216play NAS Via Mac OS X El Capitan

Leave a comment

“Synology provides high value storage solutions for home and business users. We designed the DS416 to be an affordable, all-in-one NAS server that’s optimized for encryption and sensitive data transmission,” said Jason Bonoan Synology marketing manager.

Synology DiskStation DS216play is a two-bay feature-rich NAS with powerful multimedia processing and real-time transcoding of 4K Ultra HD source content, perfect for multimedia and file sharing. While, Synology DS216play NAS can’t support DVD files. If you want to copy DVD to Synology DS216play via Mac OS X El Capitan, what would be the best way to go about it?

To get DVDs onto Synology DS216play, we’ll need a third-party Mac DVD ripping software to get the content off the DVD disc as a protection-free and easily readable element for NAS. There’re kinds of different software out there (some free, some not) with a variety of different options. It seems a bit overwhelming. Here we highly recommend Pavtube BDMagic for Mac, which can help us finish DVD conversion bypassing DVD copy protection. Read the review.

With it, you can convert DVD to almost all regular video formats like MP4, MOV, MKV, FLV, WMV, AVI, etc. without quality loss. audio from DVD movies. Best of all, it allows you to copy your DVD to hard drive via Mac 10.11 with original structure or main movie only. If you are running on Windows 10, simply turn to Pavtube BDMagic for Windows, which has the same function as the Mac version.

Hot Search: iTunes to NAS | Blu-ray to NAS | H.265 to NAS |

Copying DVDs to Synology DS216play NAS via Mac OS X El Capitan for streaming

Free Download Mac DVD Ripper for Synology DS216play:


Other Download:

– Pavtube old official address: http://www.pavtube.cn/blu-ray-ripper-mac/
– Cnet Download: http://download.cnet.com/Pavtube-BDMagic/3000-7970_4-76177782.html

Step 1. Load DVD Files

Insert your DVD disc to the drive, then launch the DVD ripping software and click the “Load Disc” button to have the DVD content imported. You can also add Blu-ray discs(with BD drive), VIDEO_TS folder, Blu-ray/DVD ISO files are the source files for converting.

Step 2. Select Synology DS216play NAS friendly format

Click Format bar and choose your desired format. To store hundreds of DVD’s on NAS, you can rip DVD to .mp4, or .avi, .mkv, etc compressed format. And click Settings bar, you can adjust the level of compression to suit the quality you want.

Tip: With the right settings you can retain the quality of the original DVD while also saving space. This is particularly helpful when streaming over your network, depending on your network quality. Simply click Settings bar and you can tweak the settings to your satisfaction and even save it as preset.

Step 3. Start ripping DVD to Synology DS216play

When everything is done, click the “Convert” button to start converting DVDs to Synology DS216play NAS compatible video files.

Once the conversion is finished, click “Open” to quickly find the converted movies. Then, Synology DS216play NAS will recognize, catalog, play and stream these DVD rips via Mac OS X El Capitan at ease.

Read More:

How to Play Blu-ray Movies on Apple TV 4?

Leave a comment

Summary: Got a hobby of enjoying Blu-ray (BD) movies on Apple TV 4? In following article, several pieces of suggestions there we can take to play BD movies on Apple TV 4.

Hot searchFormat for Apple TV | Keep iTunes Rentals on Apple TV | Play Torrents Movies on Apple TV

With the release of new Apple TV 4 on Sept 16, it gives you anytime access to endless entertainment. Thousands of videos and TV shows can be shown on your wide screen TV. What a delightful thing if Blu-ray movies can be played on Apple TV 4.

It is a tiny digital media player which allows you to enjoy a whole world of movies, TV shows, sports, music, and more. So far, the latest version of Apple TV is the forth generation, in up to 1080p HD. The device also plays content from any Mac OS X, iOS device or Windows with AirPlay or iTunes.

Apple TV is compatible with the following video formats:

H.264 video up to 1080p, 30 frames per second, High or Main Profile level 4.0 or lower, Baseline Profile level 3.0 or lower with AAC-LC audio up to 160 Kbps per channel, 48kHz, stereo audio in .m4v, .mp4, and .mov file formats

MPEG-4 video up to 2.5 Mbps, 640 by 480 pixels, 30 frames per second, Simple Profile with AAC-LC audio up to 160 Kbps, 48kHz, stereo audio in .m4v, .mp4, and .mov file formats

Motion JPEG (M-JPEG) up to 35 Mbps, 1280 by 720 pixels, 30 frames per second, audio in ulaw, PCM stereo audio in .avi file format

Still there is an irritating issue, ISO files are not read by Apple TV 4. To get the work done, you can get Pavtube ByteCopy for Macwhich is easy to use and produces excellent results. With this powerful Apple Video Converter, you can convert ISO and even other formats to Apple TV 4 supported one. There is no need to worry about how to play Blu-ray movies on Apple TV 4 anymore. If you are Windows user, please turn to Pavtube ByteCopy.


Other Download:
– Pavtube old official address: http://www.pavtube.cn/bytecopy-mac/
– Cnet Download: http://download.cnet.com/Pavtube-ByteCopy/3000-7970_4-76177783.html


Other Download:
– Pavtube old official address: http://www.pavtube.cn/bytecopy/
– Cnet Download: http://download.cnet.com/Pavtube-ByteCopy/3000-7970_4-76158512.html

How to Play Blu-ray Movies on Apple TV 4?

Step 1. Load ISO files.

Put Blu-ray disc into Blu-ray drive and connect it with your PC and then click “File”, from its drop-down list, select “Load from disc” to import ISO files to the program.

Step 2. Select output profile format.

Click “Format” bar, from its drop-down option, select “Apple TV>>Apple TV H.264 MP4” as the output format for streaming to Apple TV 4.

Step 3. Start conversion

Click “Convert” button and start ISO videos to Apple TV 4 compatible H.264 format video conversion. After conversion, you can get the converted files by clicking “Open” button. Now you can enjoying Blu-ray movies by streaming to your Apple TV 4.

Stream Blu-ray movies to Apple TV via AirPlay or iTunes

Via AirPlay: Firstly, to use AirPlay, you need to prepare one of the following devices: iPhone 4 (or later), iPad, iPad mini, or iPod touch (4th generation or later). Add the converted Blu-ray movies to iTunes and sync to your iOS device.
Secondly, be sure iOS device and Apple TV are in the same Wi-Fi network; start play the video on your device, and then swipe up from the bottom of your device screen to access Control Center and tap AirPlay; finally, tap the name of the device you want to AirPlay to.

Via iTunes: Firstly, add the converted Blu-ray videos to iTunes. Then, go to iTunes > Preferences, choose Apple TV, and make sure “Look for Apple TVs” is selected.
Secondly, on your Apple TV, choose Settings > Computers > “Connect to iTunes,” and note the passcode displayed; in iTunes, select the Apple TV (below Devices), and enter the passcode.
Thirdly, click the Summary button and select one of “Automatic Sync” and “Custom Sync”.
Now, all content are streamed to Apple TV for enjoyment.

Read More:

Ripping a DVD for WD TV Live with Best Quality

Leave a comment

WD TV Live is really a gorgeous HD media player. Since the WD TV Live was first introduced on November 2008, Western Digital has made the product upgraded to the 4th generation right now: WD TV (1st Gen), WD TV Live, WD TV Live Plus (WD TV Live 2nd Gen), WD TV Live Hub, WD TV Live Streaming (WD TV Live 3rd Gen), WD TV Play (WD TV 4rd). As a network digital media player, it becomes one of the most commonly used media to connect between HDTVs and wireless networking – it lets you to play high-definition and common movies on a home theater system, with larger screen and powerful speakers. WD TV Live has a large compatibility in modern file format such as M2TS, WMV, AVI, VOB, WMV9, MKV, MOV, FLV, and codecs including Xvid, MPEG 1, MPEG-2, MPEG-4, h.264.

Let’s back to the topic today we’ll talk about: how to rip DVD to WD TV Live? DVD discs offer a handy way to watch high-quality movie in your living room via DVD player, but discs are less convenient once you want to watch those DVD movies on HDTV through a box such as a WD TV Live any time. Instead of trying to find the disc you want to play from the book shelf placed with a large number of disc collections, you can choose to rip the disc to WD TV Live friendly files and saved onto a local USB storage device or in WD TV Live drive.

In order to let WD TV Live play back movies from DVD, all you need to do is get a digital copy of DVD you legally own. There are several software claims it can rip DVDs, but let’s stick with the easy-to use tool called Pavtube ByteCopy. It can extract and convert the contents out from DVD to WD TV Live readable video files and almost other video types. It also allows you edit the video to produce a good-looking file. Another nice thing about the software is it’s cross-platform support — it’s available for Mac (dmg) as well, so if you want to rip DVD on Mac and then put the DVD file onto WD TV Live, head over to Pavtube ByteCopy for Mac.


Other Download:
– Pavtube old official address: http://www.pavtube.cn/bytecopy/
– Cnet Download: http://download.cnet.com/Pavtube-ByteCopy/3000-7970_4-76158512.html


Other Download:
– Pavtube old official address: http://www.pavtube.cn/bytecopy-mac/
– Cnet Download: http://download.cnet.com/Pavtube-ByteCopy/3000-7970_4-76177783.html

Ripping a DVD for WD TV Live with Best Quality

Step 1: Load DVD movie.

There are several ways to import DVD into ByteCopy. You could either load DVD from disc drive, or add DVD folder,DVD ISO file from local drive.

Step 2: Choose format and set profile.

Select the optimized video format for output. In order to save original audio tracks, chapter markerssubtitles, etc, you are suggested to choose “Multi-track Video” “Lossless/encoded Multi-track MKV(*.mkv)” as output format.

Step 3. Adjust Video/Audio/Subtitle settings

Enter Settings and you can adjust profile presets as you desire. Remove unwanted audio/subtitle track, encode audio, etc.

Step 4: Convert DVD to WD TV Live Plus/Hub.

Hit on the “Convert” button and start ripping DVD to lossless MKV format. Thanks to its powerful features, it would take about half an hour to complete the task. Open output folder and find the ripped MKV file. Now you can watch DVD on WD TV Live (Plus, Hub) with original audio track preserving without hassle.

Read More:

Store MP4 on WD My Cloud for streaming on TV

Solution – Can’t play .avi on Mac OS X from WD MyCloud

Get DVD to Media Player Classic (MPC-HC) for Playback

Rip Disney DVD under Mac OS X 10.11 El Capitan

Put DVD ISO/IFO image onto iPhone 6S for Viewing