Have a bunch of DVDs sitting around your house, apart from viewing them on your standard DVD Player, you may also wish to watch it on your phone, tablet or somewhere else. The solution is that you can rip them into a digital file format on your computer and then play it anywhere as you like. In the following part, we will show you how to rip DVD to computer using the swiss army knife of video conversion tools: Handbrake. However, the problem is that Handbrake does not defeat or circumvent copy protection, but most DVDs we buy from the store have copy protection. The good news is that removing of digital rights management (DRM) from DVDs using Handbrake was possible by installing VLC, a media player application that includes the libdvdcss library. Currently, Handbrake can remove DRM only after the user installs the latest version of libdvdcss.
Rip protected DVD with Handbrake by installing libdvdcss
Install libdvdcss on Windows
First, you’ll need to download libdvdcss to your computer. For 32-bit versions of Windows, download this version. 64-bit users should download this version.
Copy the .dll file to your Handbrake program folder. If you used the default installation settings, this should be in C:\Program Files\Handbrake.
After this, Handbrake will be able to read your encrypted DVDs.
Install libdvdcss on Mac
Installing libdvdcss is a little more complicated on macOS Sierra, because Sierra or macOS High Sierra introduced a security feature called System Integrity Protection that won’t let you install libdvdcss. There’s a relatively easy way to install this, using the Terminal and some software called Homebrew, which is a command-line app installation system.
Open Terminal (it’s in your /Application/Utilities folder), and paste this line of code into the app. Make sure this entire command is on one line; the space between the first part and the second part is a space, not a line break:
/usr/bin/ruby -e “$(curl -fsSL https://raw.githubusercontent.com/Homebrew/install/master/install)”
Press Return and follow the instructions. Homebrew software will be downloaded and installed. If you haven’t previously installed the Xcode command line tools, they will also be downloaded and installed. (These are a few tools that are part of Apple’s developer software.) This process may take a couple of minutes; don’t worry if Terminal stops giving feedback while it’s downloading and installing these tools.
When this has completed, paste this command into Terminal and press Return. This tells Homebrew to install the libdvdcss file:
brew install libdvdcss
This takes just a few seconds. When this is completed, quit Terminal.
Related article: Handbrake Alternative for 7.1 TrueHD Passthrough | Top 7 Handbrake Alternative | Handbrake VS Pavtube ByteCopy
Best alternative to rip DVD with Handbrake by installing libdvdcss
Obviously, the process of using Handbrake to rip DVD by installing libdvdcss on Windows or Mac may be a little confusing or overwhelming for some users especially some beginner users. In addition, the installed libdvdcss library will only assists you to bypass the Content Scramble System (CSS) protection from commercial DVD disc, which may also included many other types of protection protection such as Region code, RCE, key2Audio, UOP, Macrovision, FluxDVD, Protect, ARccOS, AACS, BD+, ROM Mark, BD-Live, etc.
For those people who are looking for a powerful, simple to use and cross-platform DVD Ripper application as the best Handbrake alternative, we highly recommend Pavtube ByteCopy (get Mac version) to you.
The application can automatically bypass all the DVD copy protection listed above with its built-in disc decrypter in the background. In addition, it also keeps constant update with perfect support to break the new encryption used on many recently released DVD disc. You can load not only DVD disc, but also Video_TS folder and IFO/ISO image file into the application.
The DVD copying and digitizing process can be performed on the same interface and there are many different output options for you to choose. You can make a 1:1 full disc copy of DVD disc with original disc structure, a fast main movie copy without unwanted comments, trailers, ads, etc, a lossless multi-track MKV copy from DVD with all your desired subtitle languages and audio tracks. You can also choose to convert DVD to various popular SD and HD digital file formats or even devices and applications preset profile formats for viewing on computer on media player software, transfer and view on portable devices or stream to game consoles, TVs, etc.
Other beneficial features of Pavtube ByteCopy
– Flexibly adjust output profile parameters including video codec, resolution, bit rate, frame rate, audio codec, bit rate, sample rate, channels, etc as you like to get better output video and audio quality.
– Rich subtitle settings options to select desired subtitles from internal DVD movies, enable forced subtitles to disable the traditional subtitles while still preserving the subtitles that translate foreign language speaking parts or add external subtitle to DVD when the foreign language DVD movie do not contain any language subtitles you understand.
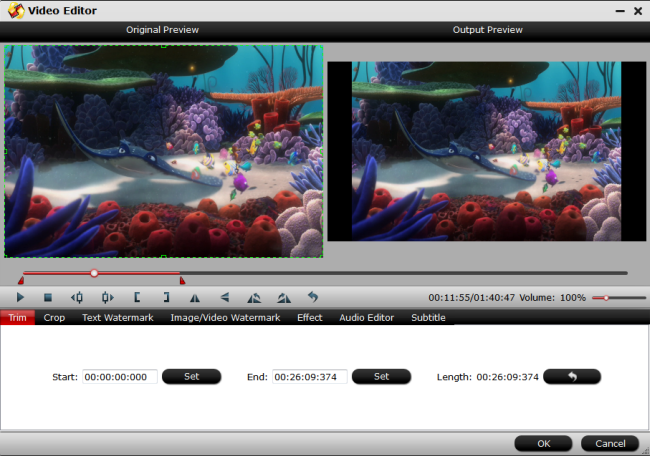
– Edit DVD movies by trimming unwanted parts, cropping out black bars or unwanted area, add video/image/transparent text watermark, apply special effect, change video color effect, remove/replace audio in DVD video, etc.
How to Rip Handrake and Libdvdcss Alternative to Rip Commercial DVD Movies?
Step 1: Load DVD disc into the program.
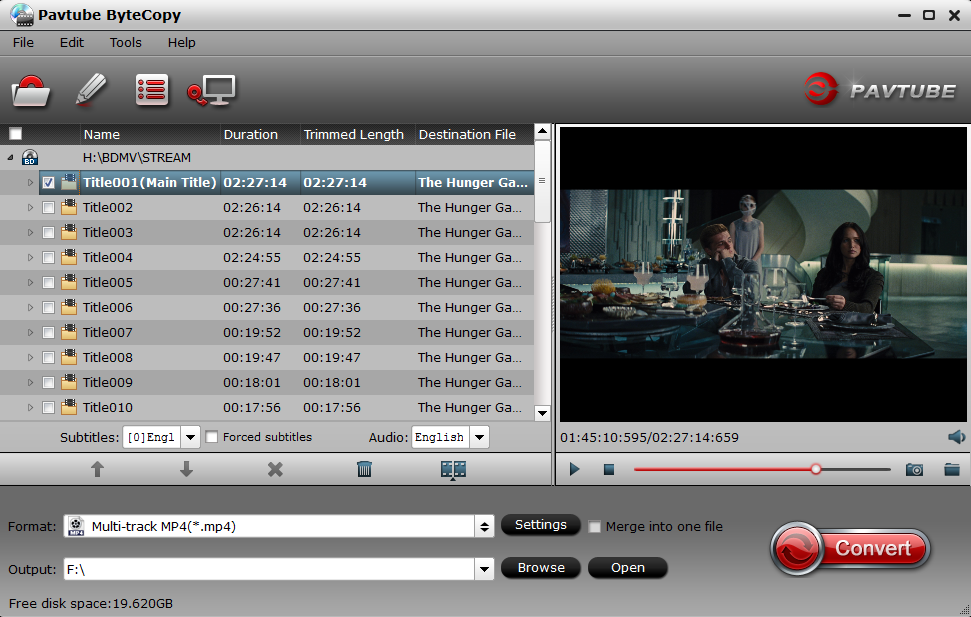
Insert your DVD into the optical drive on your computer, start the program, on the main interface, click “File”> “Load from disc” to load DVD disc into the program, you can also add Video_TS folder or IFO/Image file into the program.

Select desired subtitle: Check the movie titles you want to rip. Click the drop-down list of Subtitles, then all the subtitles info in the DVD movie will be shown clearly, so you can select your needed language as your subtitles freely.

Enable forced subtitles: Tick off “Forced subtitles” option, you will see subtitles only when actors are speaking a language that are different from the subtitles that you have specified before.

Step 2: Choose output file format.
Clicking the Format bar drop-down list, you can choose one of your desired output format or customize which formats to be shown on the list.

Step 3: Edit DVD movies.
Select a movie title or chapter on the main interface to active the “Editor” function, then click the Edit icon on the tool bar of main interface to open the Editor Window, you can play and preview the original DVD movies and output effects. Also you can flip DVD, trim, crop, add effect, reset, and adjust volume.

Step 4: Begin the DVD movie ripping or converting process.
After all setting is completed, hit the “Convert” button at the right bottom of the main interface to begin the DVD copy protection removing and DVD to digital format ripping process.
When the conversion is finished, click “Open Output Folder” icon on the main interface to open the folder with generated files. Then you can freely play the ripped DVD movies on any devices as you like.


